
Post-Receiving Processing
This page gives instructions for processing materials, including updating expiration dates, creating print slips, un-receiving items, etc. For a high level overview of the receiving stage for physical items with links to details for closing PO lines, post receiving and processing claims see Receiving Material.
For the full end to end purchasing workflow see Purchasing Workflow. For an overview of working with acquisitions in Alma, including links to relevant sections such as Infrastructure, Renewals, Invoicing, etc., see Introduction to Acquisitions.
To perform post-receiving processing tasks, you must have one of the following roles:
- Receiving Operator
Processing Materials
After you receive physical material, it may be necessary to perform work on the material before it can be made available to the library. In addition, a work order request may require you to perform work on material before other requests can be made on it.
The following additional work may be necessary:
- Copy cataloging – Complete the cataloging of the new material
- Physical processing – Add a barcode to the material
- Temp storage – Move the material to temporary storage for a short period
- Digitization – If you are at a digitization department. For more information, see Digitization Processing.
Watch the Post Receiving Process and Claims video (3:00 mins).
Additional work process statuses may have been defined by your administrator; see Configuring Work Order Type Statuses. You process new material or work orders on the In Process Items page.
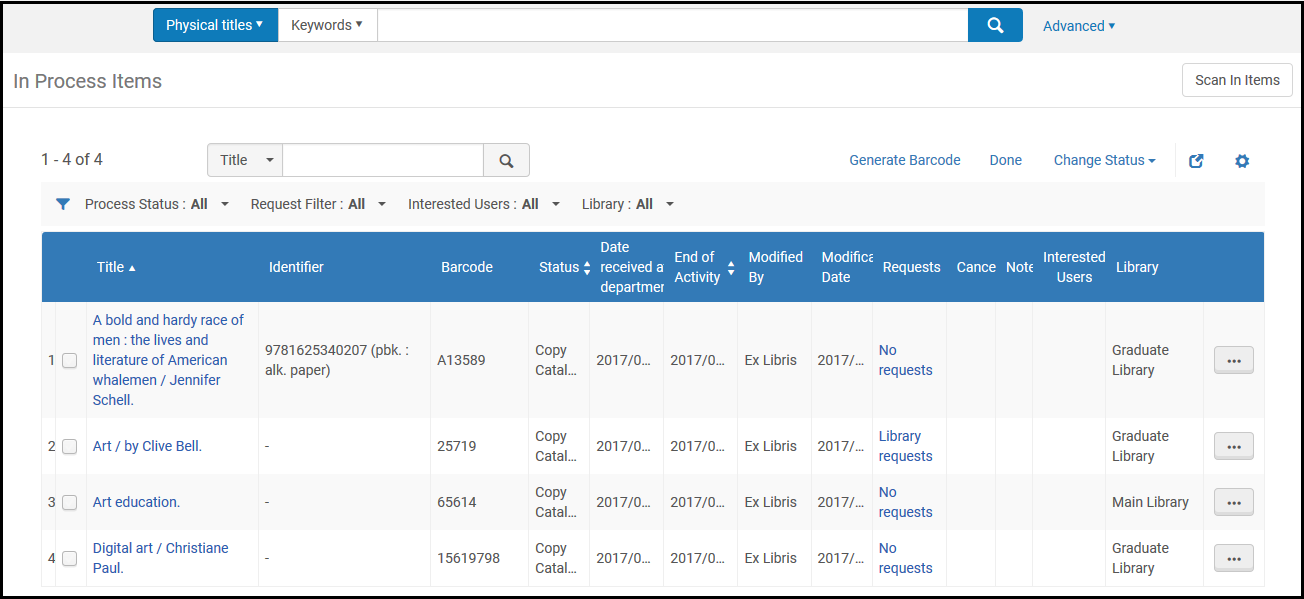
In Process Items Page
The In Process Items page can be accessed in any of the following ways:
- Fulfillment > Resource Requests > Manage In Process Items
- Fulfillment > Resource Requests > Scan In Items; select Manage In Process Items
- Acquisitions > Post-Receiving Processing > Receiving Department Items
- Select one of the following tasks in the Tasks List in the persistent menu (see Tasks in the Task List):
- Items - deposit
- Items - digitization
-
Items - document deliveryThe above tasks only appear when you are at a digitization department.
- Items - in department
-
Items - in department - requested by patron - Purchase requests (see Purchase Requests)These tasks only appear when you are at a department that enables you to manage in process items, other than digitization
The page is available only when you are working in a department that can manage work orders and you have the Work Order Operator or Receiving Operator privilege for that department, not from a resource sharing or out-of-the-box circulation department. If your circulation department was configured to manage work orders, you can navigate to the page only using the Manage In Process Items link on the Scan In Items page or the Receiving Department Items menu option.The filters, statuses, columns, and actions on this page vary, depending on your current department:
| Department | Filters | Columns | Actions |
|---|---|---|---|
| Digitization |
Step (see Digital Inventory Profile Rules):
Request Type:
|
|
|
| All other departments (for example, Acquisitions Technical Services) |
Process Status: The options depend on the work order type; see Work Orders and Departments
Request Filter:
Interested Users (see interested users in Manually Creating a PO Line):
Library:
|
|
|
Performing Tasks and Actions
In a non-digitization department, you can perform the tasks/actions below. The availability of a task depends on the item state and your role permissions.
Row Actions/Tasks:
- Edit the inventory item (Edit Inventory Item) – This opens the Physical Item Editor. For more information, see Updating Item-Level Information.
- Add a note to a request in process (Edit) – See Adding a Note to a Work Order in Process.
- Update an item’s expiration date (Update expiry) – See Updating an Expiration Date.
- Create a print slip (Print slip) – See Creating a Print Slip.
- Write the item's information to RFID (Write to RFID) – This option appears for locations with RFID and an active RFID connection as indicated by the connection icon (
 ). For additional information, see RFID Support.
 - Un-receive an item (Un-Receive) – See Un-receiving an Item.
Button Actions/Tasks:
- Change an item’s status – See Changing an Item's Status.
- Generate Barcode – See Generating Barcodes.
- Remove an item from the list (by marking it as Done) when all the work processes are complete – See Marking an Item as Done and Removing It.
The tasks available in a digitization department are described in Digitizing Items and Delivery of Digitized Items.
Changing an Item's Status
To change an item’s status:
- Select the item’s check box on the In Process Items page.
- Select the new status from the Change Status drop-down list in the table actions list.
- Select Change Status. The item’s status is changed.
- You can change the status of multiple items simultaneously by selecting multiple check boxes and then modifying the item status, as described above.
- You can also change the status of an item on the item’s Request Management page (Edit in the row actions list by selecting a different status from the Status drop-down list and selecting Save.
Generating Barcodes
Automatically generating barcodes can be handled from the In Process Items page when you system is configured for automatic barcode generation. See Configuring Barcode Generation for more information.
When you automatically generate barcodes for multiple items, it needs to be done for one library at a time. As a result, when you select multiple items/rows for generating a new barcode on the In Process Items page, they all need to be from the same library. This can easily be done by using the Library filter to display a single library's list of items to be processed. If you happen to select items from different libraries, an error message appears. You will also receive an error message if you attempt to generate a barcode for one or more items that have requests or are on loan.
To generate a barcode:
- Select the check box for one or more rows on the In Process Items page to identify the items for which you want to generate barcodes.
-
Select Generate Barcode.Alma checks for an automatic barcode generation configuration for the library identified in the row(s) you are processing. If there are multiple library-level and/or institution-level sequences that match the library in the row(s) that you are processing, a dialog box appears with sequence options. Select a sequence option.
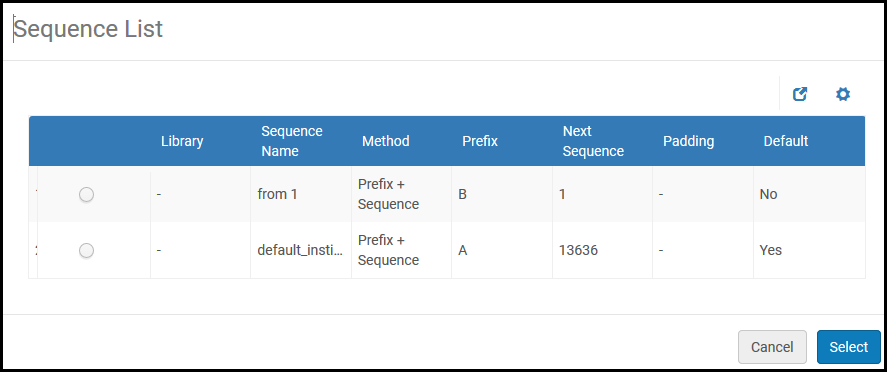 List of Institution-Level Barcode Generation Options
 -
Select a sequence and select Select. The barcode is generated and appears in the Barcode column on the In Process Items page.
Marking an Item as Done and Removing It
Marking an item as done can be handled as both a button action and a row action.
To mark an item as Done and remove it:
Select one or more check boxes on the In Process Items page and select Done in the table actions list (or select Done in a row actions list). The item(s) is removed from the page.
When working with Print – Continuous material and the Keep in Department option is selected on the Receive New Material page (see Receiving Physical Material), selecting Done (or selecting Done in a row actions list sends a notification email to Interested Users (see information regarding the Interested Users tab in Manually Creating a PO Line).
Adding a Note to a Work Order in Process
To add a note to a work order in process:
- Select Edit in a row actions list for the relevant item. The Request Management page opens.
- Select the Notes tab and enter a note in the Note field.
- Select Add. The note is displayed on the page.
- Select Save. A check mark appears in the Notes column of the Department Items page, indicating that the item contains a note/s. Hovering over the check mark displays the last note that was added to this work order in process. If there are no process notes, then if a note was added to the work order request, it will appear (see Creating a Work Order Request). You can add multiple notes. These notes apply to the processing steps of the work order, not to the work order request. These notes do not appear in the Note field for Alma Analytics Requests SA > Request Details.
To edit a note, select Edit in the row actions list and modify the note as required. Select Save to save your modification.
To delete a note, select Delete in the row actions list at the end of the note row. The note is deleted.
Updating an Expiration Date
To update an expiration date:
- Select Update expiry in the row actions list for the relevant item. The Update Expiration Date pop-up window appears.
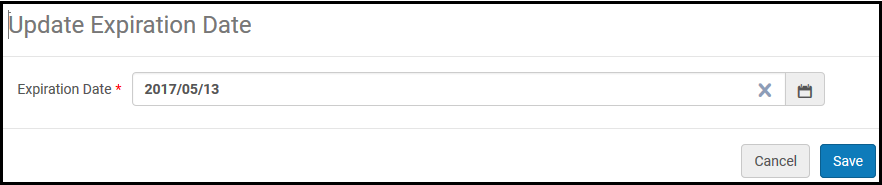 Update Expiration Date Pop-up Window
 - Select the Expiration date.
- Select Save. The expiration date is changed.
Creating a Print Slip
To create a print slip:
Select Print slip in the row actions list for the relevant item. A message appears on the top of the page indicating whether the print slip was sent successfully by email (see Configuring Allowed Emails). A printer must be defined for the acquisitions or receiving department for the print slip to be sent by email. For details on configuring a printer for a department, see Adding a Department.
Un-Receiving an Item
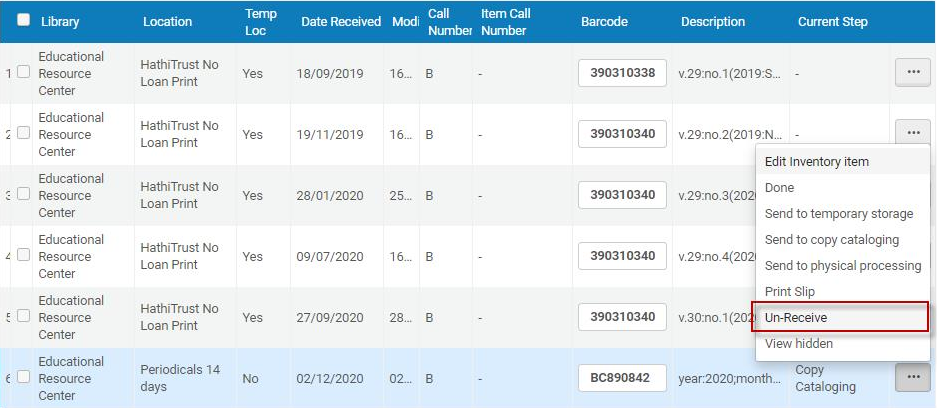
To un-receive an item:
For one time PO lines, select Un-Receive in the row actions list (in Acquisitions > Receiving and Invoicing > Receive) for the relevant item, and then select Confirm in the confirmation dialog box. The item is un-received. The item must have been received at the Acquisitions workbench for the un-receive options to be available.
To un-receive items for continuous PO lines, select Manage Items, and then select Un-Receive.
In order to be able to un-receive an item, the following conditions must be met:
- The item must have been received
- The item must still be in the receiving department
- There are no interested users related to the item.
Un-receiving an item
Scanning in Items
For information on scanning items, see Scanning Items.