
360 Resource Manager: Getting Started
- Product: 360 Resource Manager
What do we need to do to start using 360 Resource Manager?
This document is designed to get you started as quickly as possible with 360 Resource Manager. The information below is not intended to be a complete guide to everything about 360 Resource Manager; rather, it is a place to begin as you start to implement 360 Resource Manager for your library.
This document has three sections; click the section title here to jump straight to that section:
Getting Ready
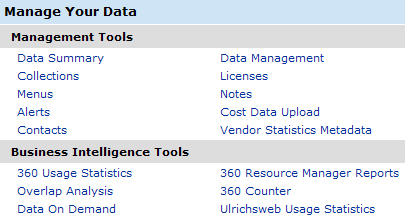
The 360 Resource Manager tools are part of the Serials Solutions Client Center. The Client Center is the administrative hub for your Serials Solutions services, including 360 Resource Manager. A working understanding of the tools in the Client Center is necessary to work with 360 Resource Manager and any other service in your 360 Suite.
A. Learn about the Client Center
If you are unfamiliar with the Client Center, we encourage you to take some time with the options below to learn more about it:
B. Populate Data Management
Before beginning to create datasets with the Resource Manager tools, it's important to have Data Management fully populated with the resources your library subscribes to and those your library is considering. Many of the data sets you create in 360 Resource Manager can be associated with or attached to resources, so the most efficient work-flow is to have the resources -- databases, e-Journals, e-Journal packages, e-Books, etc. -- already configured in Data Management.
C. Check Account Permissions
If you do not see some of the tools discussed below when you log into the Serials Solutions Client Center, it is possible that your account does not have permission to use those tools. Please contact the person at your library whose account is listed as Primary and ask that your permissions be adjusted. You can learn more about setting account permissions in a couple of different ways:
Getting Set
We'll describe each tool in 360 Resource Manager below:
You should feel free to create your own system for adding data. For example, if your library is struggling to manage Licenses, work your way through the other tools before going back to add license data to 360 Resource Manager.
New clients can also take advantage of the Data Population Service, which is a program where Serials Solutions facilitates the initial population of your e-resource management data into 360 Resource Manager.
A. Contacts
Keep track of your library contacts in a central location accessible to all in the library who need access by adding them to 360 Resource Manager. There are several ways to learn the details about adding contacts to 360 Resource Manager.
B. Licenses
Resource licenses are perhaps the most difficult feature of Resource Manager to understand. The system was built to be as flexible as possible, but that flexibility introduces some complexity that is difficult to avoid. We recommend that before you begin adding license information to 360 Resource Manager, you take some time to strategize. You'll want to decide what information in the resource licenses you want to track in 360 Resource Manager, so that it is available centrally to other library staff, and what (if any) license information you want to make available to patrons via the e-Journal Portal.
We find it's best to follow these next steps in order:
C. Menus
You can easily customize the values in many of the menus in 360 Resource Manager to match the workflow of your library.
D. Alerts
The Alerts tool allows you to specify when the Client Center should send an email to notify other Client Center users of a resource status change, upcoming license renewal date, or upcoming resource renewal date. You can set an unlimited number of alerts. Some alerts apply to any resource matching the alert criteria, while other alerts can be attached to a specific resource.
E. Notes
The Resource Notes feature is a way to keep track of various pieces of information about a resource that can come up over time. For example, you might want to keep track of technical problems, acquisitions notes, or product feedback, and be able to recall them as needed weeks or months later. Resource Notes can be attached to a collection, provider, database, or individual e-journal or e-book.
Examples of notes:
- Trial feedback
- Technical issues
- Trial set-up information
- Details about cancellation or purchasing decisions
- Acquisition details
- Special product information useful to library staff, e.g. details about access, etc.
- Interest Expressed details
- Vendor information about a resource
F. Vendor Statistics Metadata
Vendor Usage Statistics is a feature for storing metadata describing the statistics that are available from the vendor. Libraries refer to this information when they manually retrieve usage statistics from the vendor.
Fields in vendor statistics include:
- URL to obtain usage statistics
- User name and password
- Deliver Method
- Frequency
- Standards Compliance
G. Administration Information
The Administration section is where you enter details about how to access a resource's Administration Console. Because Administration information is inherited, details added at a higher level will be viewable at a lower level. For example, administration information added at the provider level will be viewable at the database level.
H. Cost Information
The Cost tool allows you to add payment information to resources at any level: collection, provider, database, or individual title (holding.) To add or edit payment information, search for the resources in the e-Catalog or browse to the resources from the Data Management Home page, and click on the Cost link from the resource's Details page. More than one payment can be added to a resource for a single fiscal year.
Costs can be added individually to resources, or you can use the Cost Data Upload tool to bulk upload costs. I. Setting Up Collections
The purpose of the Collections tool is to allow your library to create groups of resources outside of the provider/database/title hierarchy. Once a collection is created, you can attach Administration, Contacts, Cost, License, Notes, and Vendor Statistics Datasets to the collection. For example, you may choose to group all resources in a package and record the cost information, or create a collection of resources negotiated by a consortium and attach Notes about the consortium policies.
A resource can only be in one collection at a time. If you add a resource to a second collection, it will be removed from the first collection.
Go!
Congratulations! You're now ready to begin incorporating the tools of 360 Resource Manager into your library's workflow.
Because each library has its own workflow around the management of electronic resources, 360 Resource Manager has been designed to be flexible. How you use 360 Resource Manager will be unique to your library.
Here is an example of how library staff might integrate 360 Resource Manager into the library's workflow:
Interest-Expressed Workflow (example)
- Professor Tang requests that the library purchase Women Through the Ages, an exciting new resource that would support her Women's Studies class.
- Katie, the liaison for Humanities, adds Women Through the Ages to the Serials Solutions Client Center and changes the status of the resource from Not Tracked to Interest Expressed. She creates a Resource Note with the information that Professor Tang has requested this resource.
- The Custom Status Alert for Interest Express triggers an email to the members of the Collection Development Committee (CDC).
- CDC runs an Overlap Analysis report to determine what new content Women Through the Ages brings to the library's collection. CDC adds a comment to the Interest Expressed note with information about the Overlap Analysis Report
- CDC adds vendor contact information to the Client Center and then contacts the vendor for a price quote. Price and any additional information provided by vendor are added to a comment to the Interest Expressed note.
- CDC meets and decides to proceed with a trial. Trial is set up with vendor; a Trial Note is created and added to Women Through the Ages. CDC changes the status of the resource from Interest Expressed to Trial.
- The Custom Status Alert for Trial triggers an email to the Library Liaisons and Public Services Staff with instructions to look at the Trial note for access to the trial.
- Library Liaisons and Public Services Staff provide trial feedback via comments added to the Trial Note.
- Based on trial feedback, pricing, fit with existing collection, etc, CDC recommends purchasing Women Through the Ages. CDC adds comments about its recommendation to the Interest Expressed note and changes status to Recommend Purchase.
- The Custom Status Alert for Recommend Purchase triggers an email to the Associate Dean for Acquisitions, who contacts vendor to begin purchase.
Additional Resources
Serials Solutions offers e-management consulting to help your library determine the best e-resource management workflow and implementation decisions. A Training Specialist will facilitate conversations with e-resource managers and users to identify staff and user needs, workflow areas to improve, and best implementation strategies. For information about purchasing an E-Resource Management Consultation, please see this document.
As you continue to add data to your 360 Resource Manager system, there are a few more resources you may find useful:
- Date Created: 9-Feb-2014
- Last Edited Date: 21-Feb-2014
- Old Article Number: 7374