Managing Import Profiles
- Catalog Administrator (via Resources - see Managing Import Profiles section below)
- Acquisitions Administrator (via Acquisitions - see Managing Import Profiles section below)
- Acquisitions Administrator
- Purchasing Operator
- Purchasing Manager
- Repository Administrator
- Catalog Administrator
- Catalog Manager
- General System Administrator
- Repository Administrator
- Catalog Administrator
- Acquisitions Administrator
- General System Administrator
- Digital Inventory Operator
This chapter includes:
- Import Profile Types
- Managing Import Profiles (You are here)
- Importing Records Using an Import Profile
- Monitor and View Import Jobs
- Resolving Import Issues
- Importing Records with CSV or Excel Files
Managing Import Profiles
The Import Profiles Page
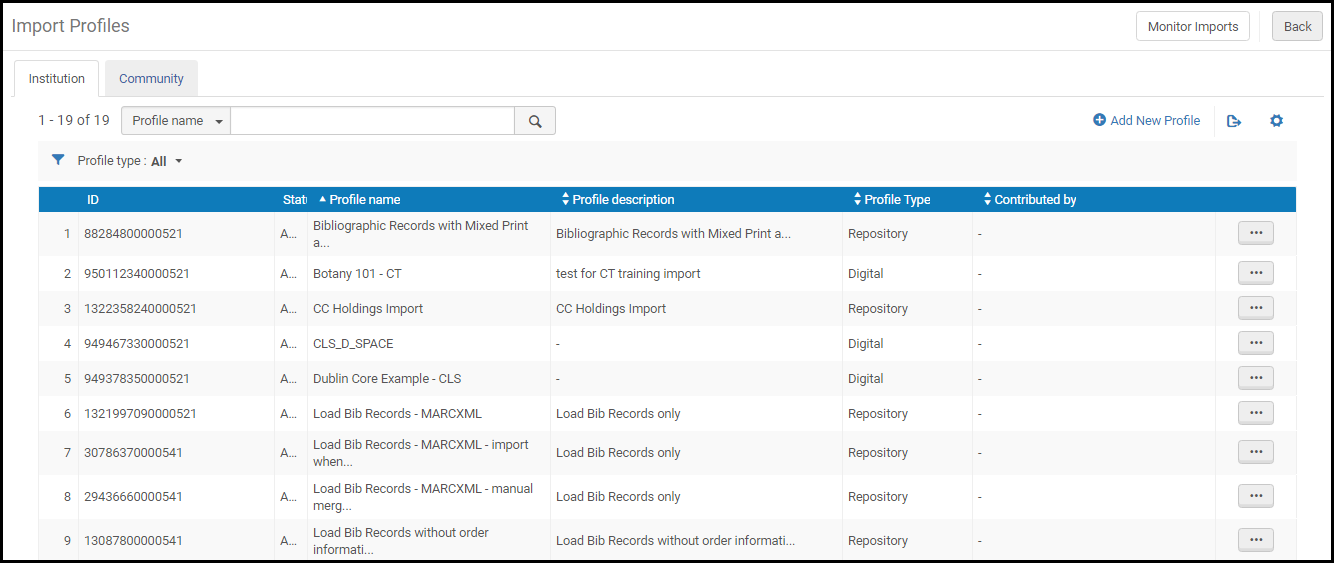
Types of Import Profiles
You can filter the profiles according to their type.
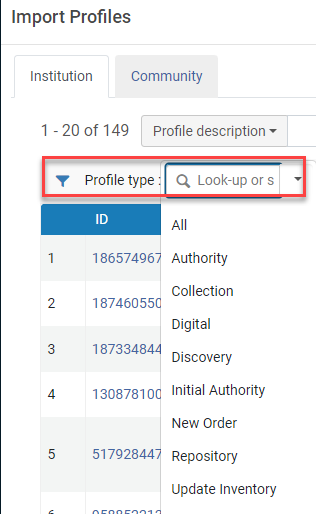
The following table describes the various profile types that display when accessing the Import Profiles page from different places in the UI.
| Path | Profile Types | Roles | Comments |
|---|---|---|---|
|
Acquisitions > Import > Manage Import Profiles |
Collection, Digital, Discovery, New Order, Repository, Update Inventory
|
Acquisitions Administrator
|
|
|
Acquisitions > Import >Import
|
Update Inventory, New Order
|
Purchasing Operator
Purchasing Manager
|
The Community and Network tabs do not display.
The Add new profile option is not available.
|
|
Resources > Import > Manage Import Profiles |
Collection, Digital, Discovery, New Order, Repository, Update Inventory
|
Acquisitions Administrator
|
|
|
Resources > Import > Import |
Collection, Digital, Discovery, Repository
|
Purchasing Operator
Purchasing Manager
|
Tabs on the Import Profile Page
- Institution - Your institution's import profiles
- Community - Import profiles contributed by other institutions. You can copy these to your institution.
- Network (when implementing a Network Zone) - Import profile templates managed by the Network Zone; see Creating Import Profile Templates in the Network Zone.
Available Actions on the Import Profile Page
- Create an import profile: See Creating an Import Profile: Profile Type.
- Edit an import profile - Select Edit from the row actions list. See the sections below for descriptions of each tab. Also see Editing Import Profiles.
- View an import profile - Select View from the row actions list.
- Copy an import profile - Select Copy from the row actions list.
When you copy a community-contributed import profile, it becomes a local import profile for your institution. - View an import profile's job history - Select Job History from the row actions list. See Monitor and View Import Jobs.
- Run an import profile - Select Run Import from the row actions list. For more information, see Importing Records Using an Import Profile.
- Contribute an import profile to the community - See Sharing Import Profiles in the Community Zone.
- Delete an import profile - Select Delete from the row actions list.
- Only inactive import profiles can be deleted.
- Once you use an import profile, it cannot be deleted because its job history remains (and cannot be deleted).
Creating/Editing an Import Profile: Overview
| Profile Type | Scenario | Steps / Tabs |
|---|---|---|
| New Order | Create | |
| Edit | ||
| Update Inventory | Create | |
| Edit |
|
|
| Repository | Create | |
| Edit | ||
| Authority | Create | |
| Edit | ||
| Initial Authority | Create | |
| Edit | ||
| Digital | Create | |
| Edit | ||
| Collection | Create | |
| Edit | ||
| Discovery | Create/Edit |
For details, see Configuring Import Profiles for Primo VE.
|
| Research Assets
Automatic Capture (for future use) (Esploro only) |
In you are implementing Esploro, you can import research assets by uploading a file, connecting to an external server, or by running automatic capture. See Adding Research Assets in Bulk. | |
Creating an Import Profile: Profile Type
- On the Import Profiles page, select Add New Profile.
The Import Profile Details wizard appears.
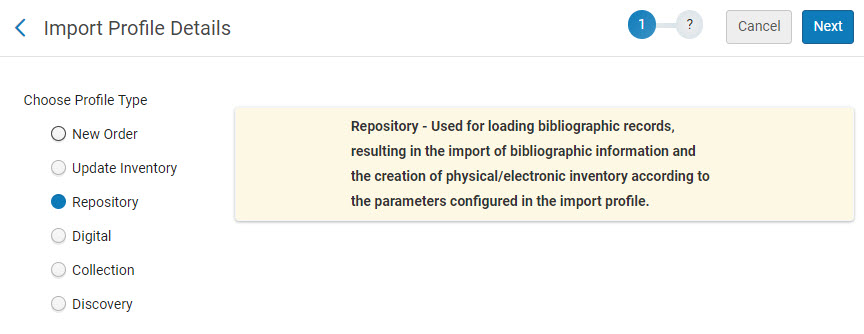 Import Profile Details Wizard - Choose Profile Type
 - Select the profile type.
The wizard begins on this page, as indicated by the circled number one (1) at the top of the page. The remaining steps in the process depend on the profile type. For example, Initial Authority (if it is available to you) has two steps. New Order has seven steps.
- Select Next.
Creating/Editing an Import Profile: General Profile Information

- On the Import Profile Details - Profile Details page, enter the following information. Fields not relevant to certain profile types are noted below.
Import Profile Details - Profile Details Fields Field Description Profile Details (Network Zone only)
Imports records to the Network Zone, matching based on the Network Zone rather than the Institution Zone. For more information on this option, see Network-Managed Records in a Collaborative Network.
The Consortia has the option to control which members can import records into the network zone repository. For more information on restricting members to import records from the Institution Zone, see Selecting Where to Create New Bibliographic Records.
Remote
(digital profile only)
Select to create a remote digital import profile. (For information on remote digital repositories, see Managing Remote Digital Repositories.) Leave empty to create an Alma (non-remote) digital import profile. For more information, see Import Profile Types. This selection cannot be changed after saving the profile.
Profile name
(required)
The profile's name. This name appears in the list of import profiles and also appears at the top of the page.
Profile description
A free text description of the profile that shows on the list of import profiles.
Originating system
(required; not relevant for digital import profile)
The type of system from which the records originated, such as the Library of Congress or OCLC.The options can be configured; see Configuring Originating Systems for Import Profiles.Remote digital repository instance
(digital profile only)
The name of the remote digital repository instance used by this profile.The options can be configured; see Managing Remote Digital Repositories.(not relevant for Alma (non-remote) digital import profiles)
The protocol used to retrieve the file containing the records. The options are:
- FTP – Retrieve by FTP. You must enter fields under Import Processing and FTP Information (see below).
When the FTP Import Protocol is selected, the FTP Information section is displayed.
- Upload File/s – Upload the file from a local or network drive.
- OAI (Repository and Authority profiles only) – Retrieve using OAI. You must define additional fields associated with the OAI server (see below).
If you change the Import Protocol for an existing import profile, the schedule options are removed from the profile but not removed from the Scheduled tab on the Monitor Jobs page. Use the following work around to address this:
- Edit the import profile and put back the scheduling option
- Set the scheduler status to inactive and save
- Change the import profile to upload
There is no scheduling option when creating an Upload file profile; however; if you change the Type to FTP and activate the scheduling option, a scheduled job is created immediately. This job can only be disabled by changing the scheduler to inactive. This does not delete the job. The job is only deleted when you delete the import profile.
Enrich with set spec
(remote digital profile only)
Select Yes to enrich the imported bibliographic records with the collection external ID from the SetSpec values.
(not relevant for remote digital or collection import profiles)
The file format of the import file. The available options are:
- Binary
-
Delimited Text File.
When you select this option, you need to specify how the text/data is delimited in the file. The following options appear:- Comma – This option is for CSV files that contain comma-separated values.
- Tab – This option is for TSV files that contain tab-separated values.
For more information, see Importing Records with CSV or Excel Files.The Delimited Text File option is available when one of the following import profile types is selected and FTP or Upload File/s is the selected import protocol (see Import protocol):- New Order
- Update Inventory
- Repository
-
Digital (Alma (non-remote) digital profiles only)
-
ExcelThis option is available when one of the following import profile types is selected and FTP or Upload File/s is the selected import protocol (see Import protocol):
- New Order
- Update Inventory
- Repository
- Digital (Non-Remote)
- XML
-
RVK XML (Authority and Initial Authority profiles only; for more information, see Working with the Regensburger Verbundklassification (RVK) Authority Record Classification)See Example file
-
OAI XML (OAI import protocol only)When selecting the OAI import protocol, this is set automatically to OAI XML and cannot be changed.
- CAT-P Text (Relevant and mandatory only for integration with NACSIS-CAT/ILL)
For the Delimited Text File and Excel options, the content of these files can be converted from one metadata standard to another (such as CNMARC to MARC 21) by using the existing cross walk capability (see Cross walk).
For CSV (non-digital) and Excel file (non-digital) imports, see Importing Records with CSV or Excel Files for more information.
When you select Binary for the phyical source format, you need to specify the encoding of the data that you are importing. Select one of the following encoding options:
- ISO8859-1
- UTF-8
- BIG5
- GBK
The format of the records in the file (when available for your institution):- MARC21 Bibliographic
- CNMARC Bibliographic
- DANMARC Bibliographic
- KORMARC Bibliographic
- OAI MARC21 Bibliographic
- UNIMARC Bibliographic
- MARC21 Authority (Authority and Initial Authority profiles only)
- OAI MARC21 Authority (Authority and Initial Authority profiles only)
- UNIMARC Authority, when available for your institution (Authority and Initial Authority profiles only)
- OAI UNIMARC Authority (Authority and Initial Authority profiles only)
- RVK Classification (Authority and Initial Authority profiles only; for more information, see Working with the Regensburger Verbundklassification (RVK) Authority Record Classification)
- Dublin Core (Digital only) - Records in dc-xml format. All prefixes are supported and are normalized to the Alma dc/dcterms prefix.
- OAI-DC (Digital only) - Dublin Core records wrapped in oai-dc format
- CSV - Comma-separated values (if you selected CSV for physical source format)
- EAD (Collection profiles only) - records in EAD XML format
- OAI-PMH ListSets (Collection profiles only) - records in the OAI-PMH Dublin Core ListSets format. Note that the ListSets document must be valid and, if it includes hierarchies, the full hierarchy must be specified (even if a higher-level set does not contain records).
- MODS
- ETD-MS
- CAT-P Text (Relevant and mandatory only for integration with NACSIS-CAT/ILL).
Target format The format in which to save the records in Alma. The available options depend on the source format selected and the other formats available for your institution. Activate for BIBFRAME target format This checkbox is only displayed if BIBFRAME work and instance are activated in the active registry. This option enables the merging of new OCLC numbers into BIBFRAME instances as a <bf:identifyBy> for match method by 001 to MMS_ID.
Status The default is Active. Select Inactive if you do not want the import profile to be available for use at this time. When set to inactive, attempting to run an import job fails immediately. Metadata Filename
(Alma (non-remote) digital profile only)
The path to the metadata file, including the file name. If this information is not correct the ingest will not work.
- A CSV template is available when the physical source format is CSV.
- Wildcards are supported.
Vocabulary code
(Authority and Initial Authority types only)
A vocabulary code, for example LCNAMES, LCSH, and MeSH. For other MARC formats, such as UNIMARC, select a relevant authority. See the relevant sections in Configuring Cataloging.
The options that appear are configured in the Managed Locally Metadata Configuration settings (see Controlling the Display and Access of Global Authorities in the MD Editor on the Configuring Cataloging page).If you choose to create MARC 21 XML files (for your source), use the standard MARC 21 XML format, as shown below.<?xml version="1.0" encoding="UTF-8"?>
<record xmlns="http://www.loc.gov/MARC21/slim">
<leader>00096nam a2200049 i 4500</leader>
<controlfield tag="003">EXL</controlfield>
<datafield tag="245" ind1="0" ind2="0">
<subfield code="a">bibliographic record sample</subfield>
</datafield>
<datafield tag="949" ind1="0" ind2="0">
<subfield code="a">1234</subfield>
</datafield>
</record>
<record xmlns="http://www.loc.gov/MARC21/slim">
<leader>00096nam a2200049 i 4500</leader>
<controlfield tag="003">EXL</controlfield>
<datafield tag="245" ind1="0" ind2="0">
<subfield code="a">bibliographic record sample2</subfield>
</datafield>
<datafield tag="949" ind1="0" ind2="0">
<subfield code="a">12345</subfield>
</datafield>
</record>
</collection>File name patterns A file name pattern (such as *.xml) filters out records that do not conform to the pattern you specify. Use this when the FTP directory contains additional files that should not be imported. This field supports regular expressions, with slight modifications:- A period . matches only a period (as if you had entered \\.).
- An asterisk * matches zero or more characters of any type (as if you had entered .*).
Otherwise, use regular expressions.Ensure that the regular expression you use exactly matches only the files that you want to import. For example:The following retrieves all files ending in ".xml" (without the quotes): .xml$The following retrieves all files containing the string “yLk” (without the quotes): yLkThe following retrieves all files beginning with “YLK” (without the quotes): ^YLKThe following retrieves all files beginning with “YLK” (without the quotes) followed by a space: ^YLK\sThe following retrieves any file that contains at least one of the following words (without the quotes): “harry” or “potter” or “rowling”: \b(harry|potter|rowling)\bThe following retrieves any file that contains all of the following words (without the quotes): “harry” and “potter” and “rowling”: (?=*?\bharry\b)(?=*?\bpotter\b)(?=*?\browling\b)Configuration options to import ZIP files via FTP:- Physical source format = Binary, File name patterns = empty - will try to import all files formats as mentioned above - the job will be Completed with Errors, profile configured to handle binary files and received another 'illegal' file's formats.
- Physical source format = Binary, File name patterns = .zip/.zip$ - will make the split job's stage (find and present the files to import), but will still Fail since the zip files will be extracted and we will have '.mrc' files that not match to the File name patterns definition.
- Physical source format = Binary, File name patterns = *.zip|.mrc* - will be Completed Successfully since the job will pass the split stage successfully and filter out the files that shouldn't be imported (txt / xlsx), and also will manage to match the 'mrc' file with the File name pattern.
This field is enabled when the source bibliographic format and target bibliographic format are different and when the source authority format and target authority format are different.For more information on the crosswalks used in Alma for conversion of metadata during metadata import, see Metadata Format Conversions.For use case examples, see Creating a UNIMARC Profile and Creating a KORMARC Profile.A normalization job runs after the crosswalk.Sharing Details (profiles shared by another institution, only) Contributed By The name of the institution that contributed the profile Contact Person The person to contact about for more information about this contributed profile. Scheduling Appears for any Alma (non-remote) digital profile or if you selected FTP as the import protocol. See below for OAI scheduling. When the profile is scheduled, a Metadata Import job appears in the list of scheduled jobs in Alma. For more information on this job, see Viewing Scheduled Jobs and Viewing Running Jobs.Files to import Select All for all files found in the FTP location. Select New to select only those files that have not yet been imported. Scheduler status Whether the scheduling is active or inactive. Scheduler
Select one of the scheduling options from the drop-down list. Times depend on your time zone and the server you are using.
Note that scheduling logic was implemented to ensure that not more than one scheduled job of the same profile runs at the same time.
For large consortia, it is recommended to schedule the imports of member institutions at varied times as running many imports to the Network Zone and when the check box "use network" is selected at the same time could result in some files failing and a need to rerun them.
If a scheduled job is started and a previous instance of the job is still running, the This instance of the job is skipped since previous instance of the job is still running message appears in the job report.
If you manually run an import job and a previous instance of the job is still running, the Job did not run – a dependent job is already in process message appears. If you run an import job via API and a previous instance of the job is still running, the same error message appears in the response.
Email Notifications Which users and email addresses receive email notifications when the publishing profile completes. Opens the Email Notifications for Scheduled Jobs page. You can choose whether to send the notifications for successful jobs and/or jobs that contain errors. FTP Information Appears only if you selected FTP as the Import Protocol.Select from Configured FTP
Other FTP SiteWhen the FTP Input Protocol is selected, the following two options are displayed for users to select: - Select from Configured FTP - select a predefined FTP account to be used in the input protocol.
- Other FTP Site - manually enter the FTP details for the input protocol.
Since the import is FTP-based, the Input directory specifies the folder from which the files will be retrieved.
 FTP Information
Description A description of the FTP submission format that is defined in this section. Server/Port The IP address and port of the FTP server sending or receiving the files. User name/Password The username and password for logging on to the server that is sending or receiving the files. Sub-directory / Is full path The path of the submission format’s input directory. If this is an absolute path, select "Is full path" checkbox and preface your path with the '/' sign. If this is a relative path, leave "Is full path" clear and start the path at your current directory. Max. Number of Files Enables users to limit the number of files processed by a job, specifically within Import Profiles. This enables better control over file imports, enabling them to set a maximum number of files to be handled during each import process. FTP server secured Whether to use a secure FTP transfer (SFTP) FTP passive mode Whether to use FTP passive mode, or not. This depends on the setting in your FTP server. Test FTP Select to run a test of the FTP connection. The test includes attempts to upload, modify, and delete a fictitious record in the input directory.
If the FTP connection is successful, the test will list the files that are found in the specified input directory on the ftp server.
When testing connection to OCLC, the modify and delete attempts will fail. However, if the upload attempt was successful, this means that the connection to OCLC server has been established.
Scheduling (OAI; see above for FTP scheduling) Appears only if you selected OAI as the Import Protocol. When the profile is scheduled, a Metadata Import job appears in the list of scheduled jobs in Alma. For more information on this job, see Viewing Scheduled Jobs and Viewing Running Jobs.Files to import Select All for all files found in the FTP location. Select New to select only those files that have not yet been imported. Scheduler
Schedule this import job. Times depend on your time zone and the server you are using.
Note that scheduling logic was implemented to ensure that not more than one scheduled job of the same profile runs at the same time.
If a scheduled job is started and a previous instance of the job is still running, the This instance of the job is skipped since previous instance of the job is still running message appears in the job report.
If you manually run an import job and a previous instance of the job is still running, the Job did not run – a dependent job is already in process message appears. If you run an import job via API and a previous instance of the job is still running, the same error message appears in the response.
Email Notifications Which users and email addresses receive email notifications when the publishing profile completes. Opens the Email Notifications for Scheduled Jobs page. You can choose whether to send the notifications for successful jobs and/or jobs that contain errors. OAI Details Appears only if you selected OAI as the Import Protocol.OAI Base URL The OAI provider’s URL, which OAI harvesters can use to load metadata. After you have entered a valid URL, select Connect and Edit to display the associated fields. If you configured a default OAI Base URL, it appears here. Authentication Whether the OAI server requires you to enter a user name and password. Username The user name if authentication is required to access the server. Password The password if authentication is required to access the server. Connect and Edit Select to refresh the page with the associated OAI fields after entering the base URL of the server and authentication information if necessary. Alma supports retrieving up to 1000 sets from OAI servers.The following fields appear after you select Connect and Edit.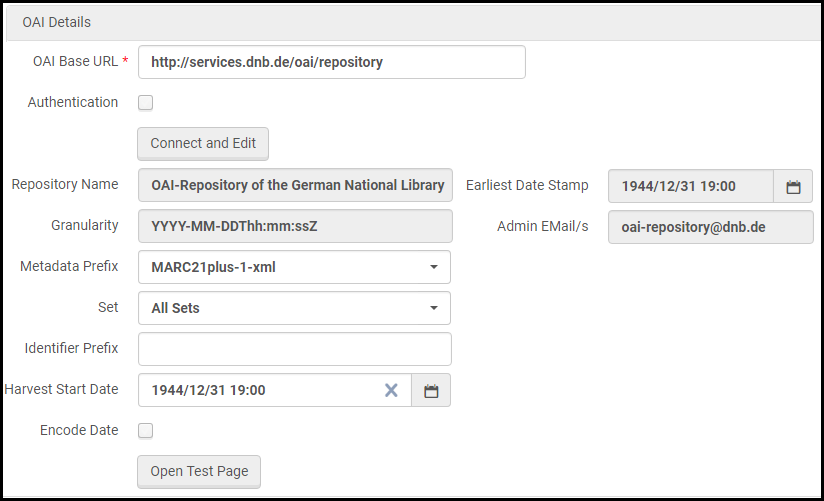 OAI Details Section After Connect and Edit
Repository Name From the OAI provider, populated by Alma. Earliest Date Stamp The earliest that data exists in the OAI provider records, populated by Alma. Admin's E-Mail OAI provider admin's email, populated by Alma. Metadata Prefix The available MD prefixes from the OAI provider, populated by Alma. If you configured a default metadata prefix, it appears here. Set OAI repository available sets, populated by Alma. Identifier Prefix
The Identifier Prefix is the shared prefix that appears before the actual unique record identifier when harvesting by the identifier.Harvest Start Date When submitting a new import job and after the job completes successfully, the Harvest Start Date is updated automatically with the job’s ending time. Encode Date Whether the repository supports encoding dates. Open Test Page Select to test the OAI connection and flow. See Testing OAI Import Protocol Flow. - FTP – Retrieve by FTP. You must enter fields under Import Processing and FTP Information (see below).
-
- If you are creating an initial authority import profile, or you are editing any type of import profile, select Save when you are done.
- If you are creating a collection import profile, select Next and continue with Creating/Editing an Import Profile: Set Management Tags.
- Otherwise, select Next and continue with Creating/Editing an Import Profile: Normalization and Validation.
- Select Save Draft to save the profile as inactive. You can continue creating the import profile by editing it at a later time.
Testing OAI Import Protocol Flow
- In the OAI Details section, select Connect and Edit after entering the base URL and the authentication information (if necessary) for the OAI server.
- Specify any additional fields that you want to test in the OAI Details section and then select Open Test Page.
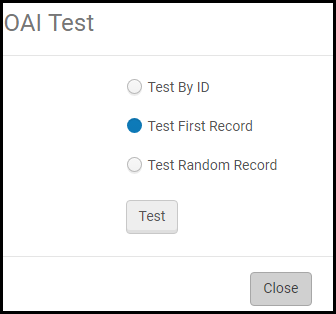
- Select one of the following options to specify the test record to use:
- Test by ID – Enter a full record identifier and harvest this record.
- Test First Record – Harvest the first record in the set.
- Test Random Record – Harvest a random record in the set.
The options Test First Record and Test Random Record are dependent on the date configured in the "Harvest Start Date" field. If no modifications were done to the first/random record after the Harvest Start Date, the test will not yield any results.
- Select Test.
The results include the following fields:
- Record Identifier
- Status – Whether the process passed successfully. If the flow failed, an error will appear in the Status field.
- Source record – Original record that was harvested
- Marc record – The bibliographic record received after converting to MARC 21 format
For digital remote repositories, the results also include the following fields:- Link to remote file, according to the setting defined in the Object Template of the Remote Digital Repository set for this profile.
- Link to thumbnail object, according to setting defined in Thumbnail Template set for this profile.
- Inventory structure – An XML structure of generated digital remote representation
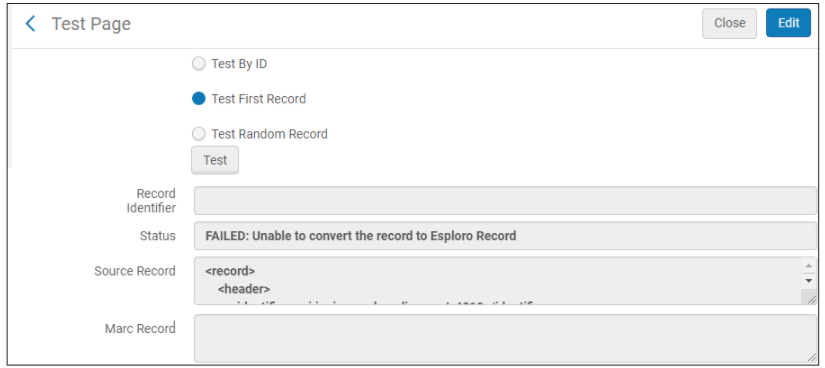 Example Test for a Repository Using OAI Protocol
Creating/Editing an Import Profile: Normalization and Validation

- On the Import Profile Details - Normalization & Validation page, enter the following information.
Import Profile Details - Normalization & Validation Fields Field Description Filter Filter out the data using Select an indication rule for the import profile. Records imported that match the logic of the indication rule are not imported as part of the import process. For more information about indication rules, including how to add new ones, see Working with Indication Rules and Filtering Sets. Normalization
Normalization rules run before the merge process.
Correct the data for matching and cataloging using Select a normalization process to correct the data. For information, see Working with Normalization Processes.During metadata import, the MARC 21 Bib Initial Normalization task is applied to the loaded data to correct the imported records, in addition to the normalization option selected here (Note that this does not apply to Authority and Initial Authority import profile types). You can see details of the MARC 21 Bib Initial Normalization process at Resources > Cataloging > Metadata Configuration; select MARC 21 Bibliographic; select the Normalization Processes tab; select MARC 21 Bib Initial Normalization.When records are imported, the normalization processes identified here are applied / processed before matching and merging/overlaying occur.Select Add BIB to Collection in this dropdown list to configure Alma to automatically assign imported digital titles to a collection according to the value of the 787 field of the MARC record. For more information, see Preparing the XML Metadata File.If fixed position fields (such as the MARC 21 LDR/008 and CNMARC LDR/100) are missing from the source content when CSV or Excel files are selected for the Physical source format in your import profile, these fixed position fields are created from the normalization process that you select here. If no normalization processes was selected and the fixed position fields are missing, the default template is used when the enable_import_computer_generated customer parameter is set to true. (see enable_import_computer_generated for more information).A normalization will run after the crosswalk. In addition, the MARC 21 Bib Initial Normalization will apply to metadata import even if disabled. If you don't want any specific initial normalization drool, you will need to delete that drool.Change the data for PO line and Inventory using Enables users to use a dedicated normalization process in the import profile to update the data used in inventory and POL mapping. For example, a library may remove the currency information from the List price field, or add temporary location information to the field mapped to items. The normalization is only applied for inventory and for PO Lines, and will not be part of the record when saved to the catalog.
For more information, watch the Import Enhancements: Normalize PO Lines and Inventory, Assign Cataloging Level video (1:56 minutes).Validation Exception Profile Handle invalid data using Select how to handle invalid data as it is imported. For more information, see Working with Validation Exception Profiles. Ex Libris recommends using the MarcXML Bib Import validation exception profile.Skip records with validation issues Select this option in order to skip validations errors during import and enable the process to complete without stopping and requiring manually intervention. In case a validation error occurs, the process will complete with a status of Completed with Errors. The user can view the details in the report. Network Zone Records Handling Import local extensions (Network Zone member option only)
See Adding Local Extensions Using Import for an explanation of this feature.
Note that the Network Zone Records Handling section in the import profile only appears when you select the Use Network Zone parameter.
-
- If you are editing any type of import profile, select Save when you are done.
- Otherwise, select Next and continue with Creating/Editing an Import Profile: Match Profile.
- Select Save Draft to save the profile as inactive. You can continue creating the import profile by editing it at a later time.
Creating/Editing an Import Profile: Match Profile
This section describes how to enter import profile match handling information on the Import Profile Details - Match Profile page. This page is not relevant for Initial Authority import profiles. Some fields/values on this page are relevant only for specific profiles; these are noted below.

For digital import profiles only a partial page appears when creating/editing a digital import profile that has a Dublin Core or MODS target format. See the following fields in the table below: Match Method, Handling method, Upon match, Allow bibliographic record deletion (Not for MODS), Do not override originating system, and Upon no match and ignore the rest.
Records with related records cannot be deleted using the Allow bibliographic record deletion and the Delete/deactivate portfolios options in the profile.
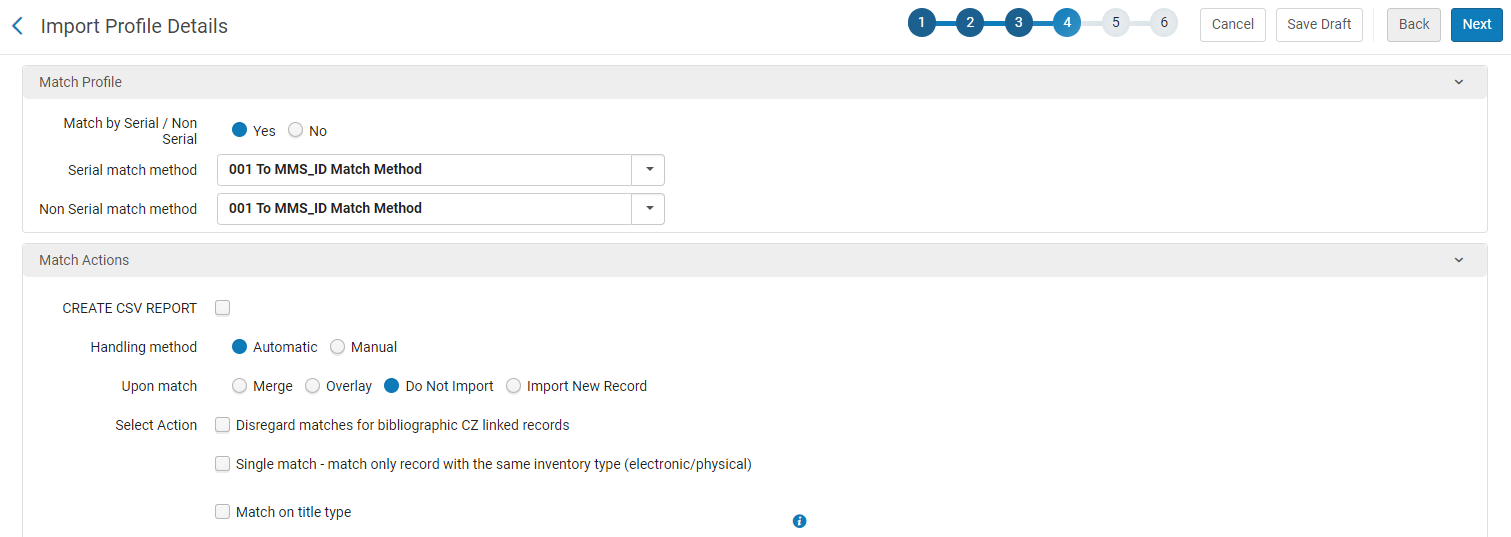
Access this page as part of the wizard when creating an import profile or by selecting the Match Profile tab when editing an import profile.
- On the Import Profile Details - Match Profile page, enter the parameter options as described in the table below according to your import requirements.
Import Profile Details - Match Profile Fields Field Description Match Profile Match method (Update Inventory, Authority, and Digital (see above), only) The method used to match data. For a detailed description and examples of some of these methods, see Match Methods – Explanations and Examples. For Update Inventory profiles, this is set automatically to By PO Line and cannot be changed.For digital import profiles configured with Dublin Core format, this is set automatically to dc:identifier and cannot be changed. Alma matches records according to the following logic:- Based on MMS_ID, referenced as follows: <dc:identifier>alma:{INST_CODE}/bibs/{MMS_ID}</dc:identifier>.
dc:identifier fields that reference MMS_IDs are considered for matching purposes only and are not saved with the imported record.
- Based on any other dc:identifier value by matching the full dc:identifier value to another record with the same dc:identifier value.
If you specified an identifier prefix, only identifiers with the prefix you entered are considered successful matches.
Match by Serial / Non Serial (New Order, Repository, and Digital (see above) only)Select Yes to consider the resource type (serial/non serial) when matching to existing records. Serial records are matched to serial records, and non-serial records are matched to non serial records. You can select a separate matching method for serial and non-serial records. When selecting this option, the Serial match method and Non-serial match method fields appear.Select No to disregard the resource type when matching existing records. You can select a single matching method for both serial and non-serial records. When selecting this option the the Match method field appears.For a detailed description and examples of some of these methods, see Match Methods – Explanations and Examples.Match method (New Order, Repository, and Digital (see above) only)Select the match method to match both serial and non-serial records. Only match methods applicable for both serial and non-serial records are available. For a detailed description and examples of some of these methods, see Match Methods – Explanations and Examples.Serial match method (New Order, Repository, and Digital (see above) only) The method used to match serial data. For a detailed description and examples of some of these methods, see Match Methods – Explanations and Examples. Non-serial match method (New Order, Repository, and Digital (see above) only) The method used to match non-serial data. For a detailed description and examples of some of these methods, see Match Methods – Explanations and Examples. Select an Electronic Collection to match against Limits the matching of Bibliographic records to a specific Electronic collection. This gives users the ability to match incoming repositories against a selected collection and not the entire catalog, enabling you to avoid multi-match events. Select the "Select from a list" button ( ) to display and select the Electronic collection to match against.
If in the import profile, you select to configure the "No Match" section with any option other than "Do Not Import", it might create a duplication of Bibliographic records that are in the catalog, but not the collection.
Match Actions: Handling method The method for handling a match. You can select from: - Automatic (default) – Alma resolves the matching according to the selected Upon match behavior. If you select this option, additional options appear in the Automatic Multi Match Handling section on this page.
- Manual – If the imported bibliographic record has a match in Alma, the import process is set to the status Manual Handling Required and the user must choose whether or not to import the record. See Resolving Import Issues.
Records with more than 150 matches are not imported. The number of records that had too many matches is listed in the job report.Upon match The action to perform when there is a match. You can select from: - Import New Record (New Order and Repository types only) – The record is imported, but there may be redundant data.
- Do not import (default; New Order and Repository types only) – The new record is discarded.
- Merge (all profiles except Digital profiles NOT configured for Dublin Core) – Merge the records according to the options chosen in the profile configuration. The history of all linking performed for this record (for example, attached PO lines) is retained.
- Overlay (all profiles) – Discard all bibliographic data in the old record and replace with the data in the new record. Like merge, the history of all linking performed for this record is retained.
- Use NZ Record (for Network Zone member institution only) – Discard the new record and instead use the record from the Network Zone.
- Use existing record (New Order type only) - Select to use the existing matched bibliographic record without modifying it, and associate the newly created resource and PO line under this matched bibliographic record. In case a matching resource is also found under the bibliographic record, only the PO line will be created.
Select Action Disregard matches for bibliographic CZ linked records
Disregard matches for bibliographic records that are linked to the Community Zone and process only matches on local records. In case of a match where there is a Community Zone record that matches the incoming record, this record is disregarded. Only a local record is considered a match.
Single match - match only record with the same inventory type (electronic/physical)
Select this option to have the system use inventory type to determine if there is a match when importing records. When this option is selected, records with different inventory types (such as electronic and physical) are not considered a match when a single match is found. Use this option, for example, when you want to maintain separate bibliographic records for electronic and physical inventory types of the same title.
When this option is not selected and a single match is found, records with different inventory types are considered a match.
Note that the import job report provides additional information when this option is selected. There is an additional row in the Bibliographic Record Matches section labeled "Match skipped - different inventory type". This row shows a count of skipped matches due to a different inventory type. See Monitor and View Import Jobs for more information.
Match on title type
This option matches the title type, electronic or physical. Incoming print titles are matched to print titles in the repository, and incoming electronic titles are matched to electronic titles in the repository. Only a record with the same title type is considered a match.
For more information on how Alma calculates the title type, see Rules Used to Create the Resource Type Field – MARC 21/KORMARC and UNIMARC.
Match Actions - Merge/Overlay: Merge method (applies only when Upon match is set to Merge) The method used to merge the data. The available predefined options include: - Conditional subject headings
- Keep only old value
- Overlay all fields but local
When using the Overlay all fields but local merge rule as part of the redirection, the 035 field is not part of the rule. This is because the redirection occurs before the merge.
- Replace 245 and 035 OCoLC if exist
For information on merge rules, see Working with Merge Rules.Select Action: Allow bibliographic record deletion
Select to have Alma delete a matching record under the following conditions:
- The imported record includes a d in LDR position 5.
- No PO line or inventory resources are associated with the bibliographic record.
- For PDA portfolios, a portfolio that is associated with the bibliographic record has the same PDA ID as the PDA profile, and the PDA is not active. For more information, see Patron Driven Acquisitions.
- In a collaborative network, a local institution record must not be linked to a Network Zone record.
- When an import job is run with an import profile that has the Allow bibliographic record deletion parameter selected and it finds a single match, the Delete action takes priority over any Merge or Overlay match action that may also be selected in the import profile. Multiple matches that are found appear in the "Bibliographic Record Matches" section of the job report and can be deleted outside of the import process (see Managing Bibliographic Records.)
- Selecting Do not import prevents deletion.
This must be selected in order for you to select Delete/deactivate portfolios on the Import Profile - Inventory Information page.Records with related records cannot be deleted using the Allow bibliographic record deletion and the Delete/deactivate portfolios options in the profile.Select Action: Do not override/merge a record with a lower brief version
This parameter helps you prevent a low quality record overlaying a good quality record when an imported record overlays or merges with an existing record. This option assumes that you do not want to overlay/merge a full or more descriptive record with a brief or less fully descriptive record. When selected, Alma compares the brief level number (01-10) of the existing and imported records. A record with a lower brief level number does not merge or overlay a record with a higher brief level number.
For more information, see Working with Brief Record Levels.Section Action: Do not override Originating System
Select this option to prevent the import process from overriding the originating system. This means that merging/overlaying a record that was loaded with a different originating system will not change its existing originating system.
The Community Zone linked records handling parameter only appears when the ignore_cz_records customer parameter is set to false. See ignore_cz_records for more information.Select one of the following options:
-
Update Community Zone record with local extensionsSelect to add/remove local extensions for the matched bibliographic Community Zone-linked records (records that already have a Community Zone cached copy) when the Merge or Overlay Upon match options are selected. This keeps the link to the Community Zone record and updates the record locally with extensions as defined in the imported record.Note that any other update of the Community Zone-linked record that is not adding or modifying a local extensions will not occur. If, for example, the imported record includes an update that is not related to local extensions such as adding the 260 $a with New York, that update will not occur.If the imported record includes a setting of $$9LOCAL for a local extension tag such as the bibliographic field 906, the local extension is created for the Community Zone-linked record similar to how local extensions are added using the Metadata Editor. See Working with Local Extension Fields for Community Zone Records for more information.For member import profiles where the Use Network Zone parameter is set to Yes, the Update Community Zone record with local extensions option does not appear as an available option.
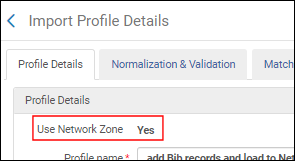 Use Network Zone Set to YesNote that the Update Community Zone record with local extensions option is available when you are logged into the Network Zone.
 -
Skip recordWhen this option is selected and the matching bibliographic record is a Community Zone-linked record, the record is skipped. That is, no update in done. When the profile is configured to skip CZ matches, but no match was found, the bibliographic record and the portfolio are created locally.Note that if no match is found in the Institution Zone, no matching attempt in made within the Community Zone.For import profiles configured prior to the March 2020 release where the option Unlink bibliographic records from Community Zone is not selected, the Skip record option is selected by default.
-
Unlink record from Community Zone and create a local recordWhen this option is selected and the matching bibliographic record is a Community Zone-linked record, the record is unlinked from Community Zone and a local copy is created at the institution level (no Community Zone cached copy is created). Any updates are performed on the newly created local record.
Do not override/merge record with an older version (Repository type, for Upon match selections Merge and Overlay only) Prevent older bibliographic records from overlaying or merging with newer records. This enables uploading records in the correct sequence by preventing the update of an existing record with an older version of the same record. This feature is enabled by the metadata record field Originating System Version, which is created from the record’s 005 control field the first time the record is imported. For information regarding normalizing the Originating System Version field, see the Update originating system information process and the procedure To configure normalization for managing the Originating System and Originating System Version information. Select from the following options:- Consider Originating System – When a matching record is found, Alma does not overlay or merge an older record with a newer record if the Originating System value in the existing record and the imported record are the same and the Originating System Version date in the existing record is newer than the date in the 005 field of the imported record. Choose this option when you want to compare the dates of matching records that originated from the same source.
- Ignore Originating System – When a matching record is found, Alma does not overlay or merge an older record with a newer record if the Originating System Version date in the existing record is newer than the date in the 005 field of the imported record. The value of the Originating System metadata field is ignored when determining whether to overlay or merge an older record. Choose this option when you want to compare the dates for any matching record with no relation to the source of the record.
You may want to use this option, for example, when YBP distributes a record with an OCLC control number and that record is an OCLC record which YBP is redistributing with additional information. The fact that the record originated in OCLC should not prevent the overlay of the OCLC record by the YBP record when the YBP record is newer.
- Disabled (default) – When a matching record is found, Alma ignores the Originating System Version date of the existing record and overlays or merges the external record with the Alma repository record according to the profile definition.
See Viewing Records Not Imported Due to Version Prevention in a Job Report for additional information regarding report results from jobs run using these options.Automatic Multi Match Handling: Appears when you select Automatic for the Handling method.To automatically resolve cases of multi-matches when importing a record, Alma supplies some options to prefer specific records according to different criteria. The options of this section work hierarchically. The hierarchy is according to the order in which these options appear (only the selected options are considered). Assuming all of these options are selected, the algorithm works as follows:
- Alma preforms the filtering of multi matches according to the top four options:
- Disregard matches for bibliographic CZ linked records. If a single match is not found, the filtered set of matches (i.e., non CZ-linked records) is transferred to be resolved the next step.
- Disregards invalid/canceled system control number identifiers. If a single match is not found, the entire set of matches is transferred to be resolved the next step.
- Prefers record with the same inventory type (electronic/physical). If a single match is not found, the entire set of matches is transferred to be resolved the next step.
- Match on title type. This option matches the title type, electronic or physical.
This minimizes the set of potential matches, and might even resolve the multi match issue. - If more than one record remains in the set of possible matches, Alma acts according to your selection of a conclusive action - you can choose to either skip and not import unresolved records, or choose the latest created record from the whole set of potential matches.
Disregard matches for bibliographic CZ linked records
Appears only if the parameter ignore_cz_records is set to false (see Configuring Other Settings.
Disregard matches for bibliographic records that are linked to the Community Zone, and process only matches on local records. Alma automatically resolves cases in which there is a multiple match because there is both a local and Community Zone record that match the incoming record. Only the local record will be considered a match. This field is relevant only for multiple matches.Disregard invalid/canceled system control number identifiers Filter out (ignore) the canceled/invalid identifiers in the 035$z. See Automatic Handling of Multiple Matches During Import for Canceled/Invalid Identifiers in the 035 for more information.
Prefer record with the same inventory type (electronic/physical) Give preference to a matching bibliographic record that contains the same type of inventory as the records that you are importing. This option is also supported when implementing a Network Zone and for real-time ordering (see Real-Time Ordering), if configured in the profile.When preference is given to the inventory type, the best match is determined as follows during the import:Alma determines the source record's inventory type using the Inventory Operations field (see Creating/Editing an Import Profile: Inventory Information):
- None - No preference based on inventory.
- Physical - The preference is based on physical inventory.
- Electronic - The preference is based on electronic inventory.
- Mixed - The inventory type (electronic or physical) is determined for each bibliographic record according to the mapping of the Resource type field.
The input file should include P for physical and E for electronic in the field that is defined as Resource type.
For example, if the Resource type field is 888 $d, each record in the input file should include:- <datafield tag="888" ind2=" " ind1=" "> <subfield code="d">P</subfield> </datafield>
- OR <datafield tag="888" ind2=" " ind1=" "><subfield code="d">E</subfield></datafield>
Alma determines the inventory type for each matching record as follows:
- If the matching record includes both physical and electronic inventory, the inventory is considered to be mixed.
- If the matching record includes only physical or electronic inventory, the inventory of the matched record is considered to be of that type of inventory.
- If only one of the matching records contains the same inventory type as the source (electronic or physical records), it will be considered a match. If there are multiple matching records that contain the same inventory type as the source, no preference will be based on inventory type.
- If only one of the matching records contains mixed inventory, and there are no matching records that contain only electronic or physical records, the mixed record will be considered a match. Otherwise, no preference will be based on inventory type.
Match on title type This option matches the title type, electronic or physical. Incoming print titles are matched to print titles in the repository, and incoming electronic titles are matched to electronic titles in the repository. Only a record with the same title type is considered a match. Alma automatically resolves cases in which there is a multiple match because there is both a physical and electronic record that match the incoming record. Only the same record type is considered a match.
This field is relevant only for multiple matches.
Choose a conclusive action in case the above selected criteria result in multiple records Select if you want to automatically determine what to do if more than one record remains in the set of possible matches.
- Skip and do not import - Select to not import multiple matches.
In the import job report, instead of multiple matches being sent to the Matching section of the Resolve Import Issues page (see Resolving Import Issues), they are added to a report (Download records that were skipped due to multi-match automatic handling). - Use record with the latest created date - Select to use the record that was created last. This option allows you to always have a single record selected in cases of multi matches.
In the import job report, the amount of multi matches that was resolved this way appears under the counter "Multi-matches resolved automatically, use latest created record".
This option is applicable only in the Repository and New Order import profile types.
If this option is not selected, multi matches will have to be handled manually.
Merge Records and Combine Inventory for Multi-Match (New Order, Update Inventory, Repository, and Digital types only):The settings in this section are used when processing failed import records in the Resolve Import Issues page (see Resolving Import Issues). The parameters and options are used to handle (by merging and combining) the multiple matching duplicate records that exist in the Alma database that cause a new match in the file being imported to fail. The record that fails to be imported appears in the Resolve Import Issues page unless you select an option in the import profile to prevent this, such as Skip and do not import. The settings are used to merge and combine two or more previously existing duplicate records into one record that can subsequently be merged (or overlaid) with the new record that you are trying to import. See Merging Records and Combining Inventory on the Resolving Import Issues page for more information.- When you create a new import profile, you need to select the Merge or Overlay option for the Upon match parameter in order for the Merge Records and Combine Inventory for Multi-Match section to appear.
- For information on configuring Alma to take an identifier from the secondary record and place it in the primary record when merging records, see Configuring BIB Redirection Fields.
- This functionality is available when importing to the institution the user is logged in to. Note that the Merge Records and Combine Inventory for Multi-Match in the import profile is displayed when the Use Network Zone parameter is not selected.
Merge and Combine Select Manually.If you select Disable, the entire Merge Records and Combine Inventory for Multi-Match section of the import profile is ignored.Preferred record Select the method for identifying the preferred record of the multiple matching records that exist in the Alma database. The following options are provided:- Record with the most items
- Record with highest brief level
Secondary record Select the method for handling the one or more secondary records of the multiple matching records that exist in the Alma database. The following options are provided:- Delete
- Suppress
- Keep it
Merge method Select your preferred merge method from the drop-down list of options. Update holdings call number
Select to update the call number information (using the bibliographic call number) for all the holdings associated with the preferred record, after the bibliographic merge has been processed. If one of the call number fields is updated in the bibliographic record, this may affect the call number that eventually appears in the holdings records.
This setting applies to the initial merge and combine of previously-existing duplicate records into one record. It does not apply to the subsequent merge (or overlay) of the merged record with the record that you are trying to import.
This parameter does not update a call number in an existing holdings record. To update a call number in a holdings record after its bibliographic record was updated from running import, open the holdings record in the MD Editor and use the function Tools > MARC21 Holdings > Update from Bibliographic.
See Handling Record Redirection for more information.Canceled record field Specify the field (such as the 035 or the 889) in the imported record that contains the ID for the record that is canceled. Canceled record subfield Specify the subfield (such as $z in the 035 or $w in the 889) within the Canceled record field in the imported record that contains the ID for the record that is canceled. Canceled record Select one of the following options to identify how you want canceled records to be handled:- Delete
- Suppress
- Keep it
Merge method This method determines how the canceled records are merged with the primary record.Update holding call number Select this option to update the holdings call numbers when records are merged. No Match (New Order, Repository, and Digital types only): Upon no match Indicate whether to import the records for which a matching record was not found in Alma:
- Do Not Import - Select not import the records that do not already exist in Alma.
- Import Records for Redirection - Select this option only when the "Do Not Import" option is already selected, and if you have configured the "Handle Record Redirection" section (see Handling Record Redirection). Select this option in cases when your institution prefers to import record updates only for records that already have inventory information in Alma, and not new records. When selected, the redirection is done even if the new record does not exist in Alma, as long as there was an existing match for the cancelled record. For details, see Records redirection when the record is not in Alma.
This option is disabled by default. To enable this option, please contact the Ex Libris customer support.
- Import - Select to import the records to local institution.
- Add to Network Zone - (Network Zone only)
- Based on MMS_ID, referenced as follows: <dc:identifier>alma:{INST_CODE}/bibs/{MMS_ID}</dc:identifier>.
-
- If you are creating an Authority import profile, or you are editing any type of import profile, select Save when you are done.
- If you are creating an Update Inventory profile, select Next and continue with Creating/Editing an Import Profile: Inventory Information.
- Otherwise, select Next and continue with Creating/Editing an Import Profile: Set Management Tags.
- Select Save Draft to save the profile as inactive. You can continue creating the import profile by editing it at a later time.
Match Methods – Explanations and Examples
| Field | Description |
|---|---|
| 001 to MMS ID Match Method (predefined by Ex Libris) |
Matches based on the Alma ID. To be used when importing a record that was previously exported from Alma. When this match method is picked for as Serial / Non Serial match method, automatically it is used also as the Non-Serial / Serial match method; even when the MD Import > Match profile > "Match by Serial / Non-Serial" indicates "Yes".
When importing records from OCLC while merging based on 001 to MMS ID, if the checkbox is marked then the import will support adding a bf:idenfitiedBy with the OCLC number to the BIBFRAME instance as well.
|
| 024 / 035 Match Method |
Matches based on the 024 or 035 fields. If a field contains several values, any one of the values is used to match. Either field may be checked first. To increase the accuracy of the match process, before comparing the records, this match method adds a new 035 field to the incoming record that combines the 001 and 003 fields of the incoming record. (If the incoming record does not contain both a 001 and a 003 field, no 035 field is created by the match method.) This new 035 field is then taken into account in the matching process. |
|
and System Identifier Prefix
|
Matches based on the system control number that uses any 035 field. If the 035 field contains several values, any one of these values is used to match. Note that the values in the input file and the library record, including contents in parentheses, must be identical (although the contents in parentheses do not have to be a recognized OCLC prefix). For a comparison of the way in which this match method and the Unique OCLC Identifier Match Method work, see below. For information on defining the fields for match profiles for serial items, see Serial Match Profile. To increase the accuracy of the match process, before comparing the records, this match method adds a new 035 field to the incoming record that combines the 001 and 003 fields of the incoming record. (If the incoming record does not contain both a 001 and a 003 field, no 035 field is created by the match method.) This new 035 field is then taken into account in the matching process.
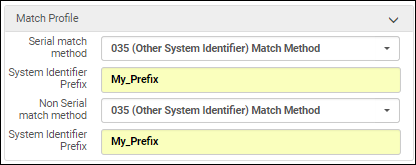
The System Identifier Prefix parameter appears when you select the 035 (Other System Identifier) Match Method. This option makes the match processing more granular. This parameter enables you to specify a 035 prefix that filters the matching process based on the prefix that you enter.
 |
| Active 035 (Other System Identifier) Match Method | Matches based on the system control number that uses only 035 $a. For information on defining the fields for match profiles for serial items, see Serial Match Profile. |
|
Select this option to have Alma invoke the Fuzzy Serial Match Method and do additional checks for the following:
For information on defining the fields for match profiles for serial items, see Serial Match Profile. |
|
| Title Statement Extended Fuzzy Serial Match Method |
Same functionality as the Extended Fuzzy Serial Match Method, except that when matching against the title, this profiles matches only by 245 a,b,k,n,p and not by 245 a,b,k,n,p, 245 a, 210 a, 246 a. For information on defining the fields for match profiles for serial items, see Serial Match Profile. |
| Fuzzy Serial Match Method (CDLSeMatchingProfile) |
For information on defining the fields for match profiles for serial items, see Serial Match Profile. Uses the following algorithm.
Alma attempts to find records with, at least, one of the following matching IDs:
If no matches are found through this attempt:
The following title and author fields are used for matching:
Examples:
When the 100/245 match and the 210 exists in the Alma record but is lacking in the incoming record, will there be a match? Yes. Once the records are matched by the 100/245, that is enough. There is no need to check the 210.
When the 100/245 match and the 246 exists in the Alma record but is lacking in the incoming record, will there be a match? Yes. Once the records are matched by the 100/245, that is enough. There is no need to check the 246.
When the 100/245 match and the 246 exists in the Alma record has one or more 700 fields but the incoming record is lacking all or some of the 700 fields, will there be a match? Yes. Once the records are matched by the 100/245, that is enough. There is no need to check the 700 field(s).
If no matches are found in either attempt, Alma issues a message that no matches have been found.
|
| ISSN (exact subfield match)/ 024 / 035 Match Method |
For information on defining the fields for match profiles for serial items, see Serial Match Profile. Matches based on any one of the following fields:
If a field contains several values, any one of the values is used to match.
|
| ISSN / 024 / 035 Match Method |
For information on defining the fields for match profiles for serial items, see Serial Match Profile. Matches based on any one of the following fields:
If a field contains several values, any one of the values is used to match.
|
| ISSN Match Method |
Matches based on the 022 (subfields a and z, which are indexed to ISSN), 775 (subfield x, which is indexed to ISSN), or 776 (subfield x, which is indexed to ISSN) fields only. For information on defining the fields for match profiles for serial items, see Serial Match Profile. |
| ISSN Match Method (exact subfield match) |
Matches based on an exact match of the 022 $a or the 022 $z, 775 (subfield x, which is indexed to ISSN), or 776 (subfield x, which is indexed to ISSN) fields.
For an exact match to occur, the 022 subfield, for example, and its content in the imported record must exactly match an 022 subfield and its content in Alma. If the import record has the ISSN in 022 $a and the record in Alma has the ISSN in 022 $z, there is no match.
Using the 022 for example, an exact match occurs when the imported record contains 022 $a 12345 and the import processing finds a record in Alma with 022 $a 12345.
For information on defining the fields for match profiles for serial items, see Serial Match Profile.
|
| LCCN Serial Match Method |
Matches based on the 010 $a field only. For information on defining the fields for match profiles for serial items, see Serial Match Profile. |
| Multi Step Match Method |
It can be difficult to select the most appropriate matching routine, as different routines might be suitable for different situations. This method allows you to match based on several matching routines that are run one after the other on each record. For information on defining the fields for match profiles for serial items, see Serial Match Profile. This method is available in the following profile types:
To use this method, the desired matching routines and the order in which they are run must be defined in the Multi Step Match Configuration mapping table (Configuration > Resource Management > General > Multi Step Match Configuration), see Multi Step Match Configuration. For consortia members, when the import profile is defined to use the network zone (Use Network Zone = Yes in the Profile Details), the Multi Step Match Method configuration should be defined in the Network institution. |
| Unique OCLC Identifier Match Method |
For information on defining the fields for match profiles for serial items, see Serial Match Profile. The unique OCLC match method search for serial and non-serial matches, even when the MD Import > Match profile > "Match by Serial / Non-Serial" indicates "Yes". Matches based on a matching OCLC prefix and number. Any one of the following prefixes in the 035 field, subfields a or z, regardless of any zero-padded data is considered to be the same for matching purposes: (OCoLC), ocm, ocn, or on. (In other words, the OCLC prefix in the library record and in the input file do not have to be identical in order for a match to be made.) To increase the accuracy of the match process, before comparing the records, this match method adds a new 035 field to the incoming record that combines the 001 and 003 fields of the incoming record. (If the incoming record does not contain both a 001 and a 003 field, no 035 field is created by the match method.) This new 035 field is then taken into account in the matching process.
|
| Field | Description |
|---|---|
| 001 to MMS_ID Match Method (predefined by Ex Libris) |
Matches based on the Alma ID. To be used when importing a record that was previously exported from Alma. For information on defining the fields for match profiles for non-serial items, see Non-Serial Match Profile. When this match method is picked for as Serial / Non Serial match method, automatically it is used also as the Non-Serial / Serial match method; even when the MD Import > Match profile > "Match by Serial / Non-Serial" indicates "Yes".
|
| 024 / 035 Match Method |
Matches based on the 024 or 035 fields. If a field contains several values, any one of the values is used to match. Either field may be checked first. For information on defining the fields for match profiles for non-serial items, see Non-Serial Match Profile. |
|
035 (Other System Identifier) Match Method
and System Identifier Prefix
|
Matches based on the system control number that uses any 035 field. If the 035 field contains several values, any one of these values is used to match. Note that the values in the input file and the library record, including contents in parentheses, must be identical (although the contents in parentheses do not have to be a recognized OCLC prefix). For a comparison of the way in which this match method and the Unique OCLC Identifier Match Method work, see below. For information on defining the fields for match profiles for non-serial items, see Non-Serial Match Profile. To increase the accuracy of the match process, before comparing the records, this match method adds a new 035 field to the incoming record that combines the 001 and 003 fields of the incoming record. (If the incoming record does not contain both a 001 and a 003 field, no 035 field is created by the match method.) This new 035 field is then taken into account in the matching process.
The System Identifier Prefix parameter appears when you select the 035 (Other System Identifier) Match Method. This option makes the match processing more granular. This parameter enables you to specify a 035 prefix that filters the matching process based on the prefix that you enter.
 |
|
For information on defining the fields for match profiles for non-serial items, see Non-Serial Match Profile. Select this option to have Alma invoke the Fuzzy Non-Serial Match Method and do additional checks for the following:
|
|
| Title Statement Extended Fuzzy Non-Serial Match Method |
Same functionality as the Extended Fuzzy Non-Serial Match Method, except that when matching against the title, this profiles matches only by 245 abknp and not by 245a, 210a, 246a. For information on defining the fields for match profiles for non-serial items, see Non-Serial Match Profile. |
| Fuzzy Non-Serial Match Method (CDLMatchingProfile) |
For information on defining the fields for match profiles for non-serial items, see Non-Serial Match Profile. Uses the following algorithm:
Alma attempts to find records with at least one of the following matching IDs:
If no matches are found through this attempt:
The following title and author fields are used for matching:
Examples:
When the 100/245 match and the 210 exists in the Alma record but is lacking in the incoming record, will there be a match? Yes. Once the records are matched by the 100/245, that is enough. There is no need to check the 210.
When the 100/245 match and the 246 exists in the Alma record but is lacking in the incoming record, will there be a match? Yes. Once the records are matched by the 100/245, that is enough. There is no need to check the 246.
When the 100/245 match and the 246 exists in the Alma record has one or more 700 fields but the incoming record is lacking all or some of the 700 fields, will there be a match? Yes. Once the records are matched by the 100/245, that is enough. There is no need to check the 700 field(s).
If no matches are found in either attempt, Alma issues a message that no matches have been found.
|
| ISBN (exact subfield match)/ 024 / 035 Match Method |
For information on defining the fields for match profiles for non-serial items, see Non-Serial Match Profile. Matches based on any one of the following fields:
If a field contains several values, any one of the values is used to match.
|
| ISBN / 024 / 035 Match Method |
For information on defining the fields for match profiles for non-serial items, see Non-Serial Match Profile. Matches based on any one of the following fields:
If a field contains several values, any one of the values is used to match.
|
| ISBN Match Method |
Matches based on the 020 (subfields a and z, which are indexed to ISBN) or 775/776 (subfield z, which is indexed to ISBN) fields only. For information on defining the fields for match profiles for non-serial items, see Non-Serial Match Profile. When using an import profile, the ISBN match method for non-serial records is not applied. This is because the "001 to MMS ID Match Method" is used for serial records. If this method is selected for serial, it will be used for non-serial as well, and the setting in the non-serial match method is ignored. |
| ISBN Match Method (exact subfield match) |
For information on defining the fields for match profiles for non-serial items, see Non-Serial Match Profile. Matches based on an exact match of the 020 $a or the 020 $z or 775/776 (subfield z, which is indexed to ISBN) fields. For an exact match to occur, the 020 subfield, for example, and its content in the imported record must exactly match an 020 subfield and its content in Alma. If the import record has the ISBN in 020 $a and the record in Alma has the ISBN in 020 $z, there is no match.
Using the 020 for example, an exact match occurs when the imported record contains 020 $a 12345 and the import processing finds a record in Alma with 020 $a 12345.
|
| LCCN Match Method |
Matches based on the 010 $a field only. For information on defining the fields for match profiles for non-serial items, see Non-Serial Match Profile. |
| Multi Step Match Method |
It can be difficult to select the most appropriate matching routine, as different routines might be suitable for different situations. This method allows you to match based on several matching routines that are run one after the other on each record. For information on defining the fields for match profiles for non-serial items, see Non-Serial Match Profile. This method is available in the following profile types:
To use this method, the desired matching routines and the order in which they are run must be defined in the Multi Step Match Configuration mapping table (Configuration > Resource Management > General > Multi Step Match Configuration), see Multi Step Match Configuration. For consortia members, when the import profile is defined to use the network zone (Use Network Zone = Yes in the Profile Details), the Multi Step Match Method configuration should be defined in the Network institution. |
| Unique OCLC Identifier Match Method |
The unique OCLC match method search for serial and non-serial matches, even when the MD Import >Match profile > "Match by Serial / Non-Serial" indicates "Yes". Matches based on a matching OCLC prefix and number. Any one of the following prefixes in the 035 field, subfields a or z, regardless of any zero-padded data is considered to be the same for matching purposes: (OCoLC), ocm, ocn, or on. (In other words, the OCLC prefix in the library record and in the input file do not have to be identical in order for a match to be made). For information on defining the fields for match profiles for non-serial items, see Non-Serial Match Profile. To increase the accuracy of the match process, before comparing the records, this match method adds a new 035 field to the incoming record that combines the 001 and 003 fields of the incoming record. (If the incoming record does not contain both a 001 and a 003 field, no 035 field is created by the match method.) This new 035 field is then taken into account in the matching process.
|
- The F numbers (such as F1, F2, F3) are for internal purposes only and should be disregarded.
Comparison Between 035 (Other System Identifier) and the Unique OCLC Identifier Match Methods
| Value in Library Record | Value in Input File | Unique OCLC Identifier Match Method | 035 (Other System Identifier) Match Method |
|---|---|---|---|
| 035 $$a(OCoLC)2014031801 | 035 $$a2014031801 | No match | No match |
| 035 $$a(OCoLC)2014031801 | 035 $$aocm2014031801 | Match | No match |
| 035 $$a(OCoLC)2014031801 | 035 $$a(ocm)2014031801 | No match | No match |
| 035 $$a(OCoLC)2014031801 | 035 $$a(OCoLC)2014031801 | Match | Match |
| 035 $$a(apple)2014031801 | 035 $$a2014031801 | No match | No match |
| 035 $$a(apple)2014031801 | 035 $$a(orange)2014031801 | No match | No match |
| 035 $$a(apple)2014031801 | 035 $$a(apple)2014031801 | No match | Match |
| 035 $$a2014031801 | 035 $$a(OCoLC)2014031801 | No match | No match |
| 035 $$a2014031801 | 035 $$a2014031801 | No match | Match |
| 035 $$a(OCoLC)2014031801 | 001 2014031801 003 OCoLC |
Match | Match |
Automatic Handling of Multiple Matches During Import for Canceled/Invalid Identifiers in the 035
- Open the Import Profiles page (Resources > Import > Manage Import Profiles).
- Create a new import profile or edit (From the row actions list, select Edit) an existing import profile and locate the Automatic Multi Match Handling section.
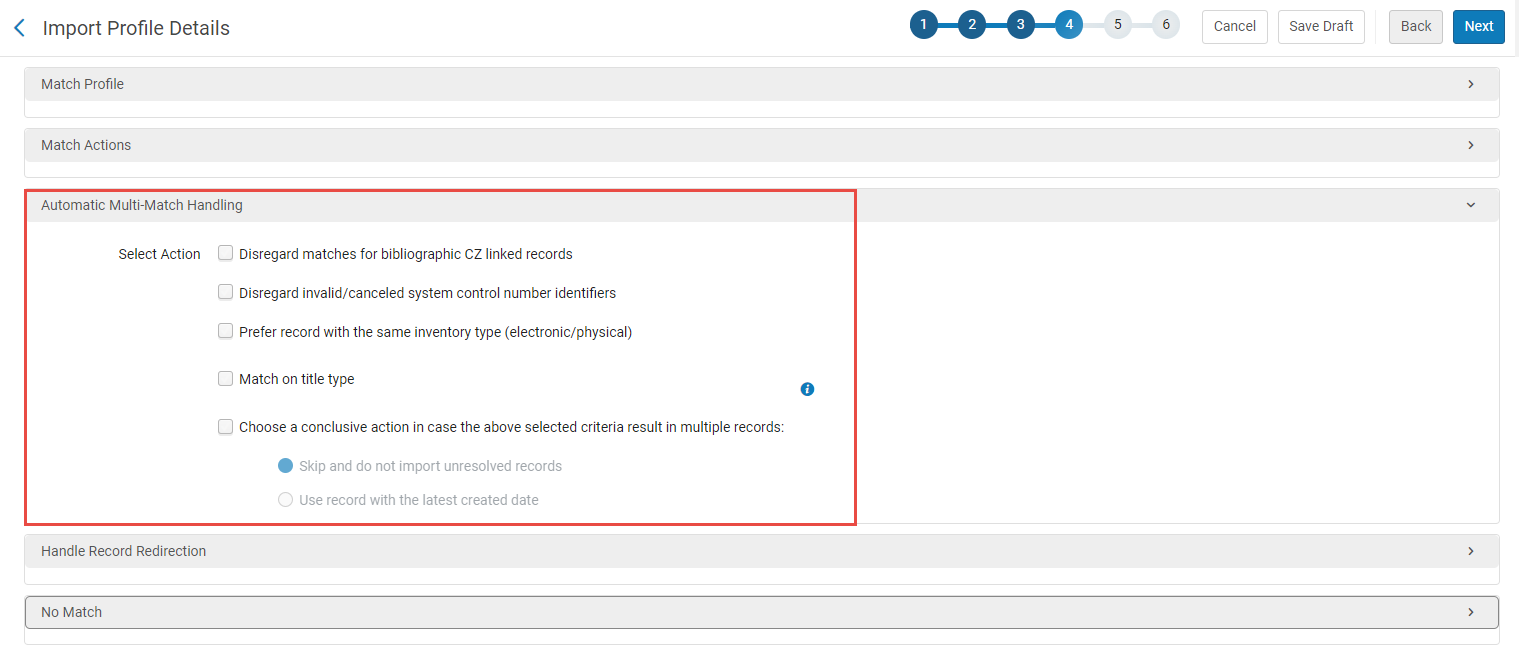 Automatic Multi Match Handling Section
 - Select the Disregard invalid/canceled system control number identifiers parameter.
When you select Disregard matches for bibliographic CZ linked records in addition to Disregard invalid/canceled system control number identifiers, Alma processes/handles multiple matches for the Disregard matches for bibliographic CZ linked records parameter first and, subsequently, processes any remaining multiple matches using the Disregard invalid/canceled system control number identifiers parameter. The parameters selected in the Automatic Multi Match Handling section of the import profile are processed sequentially as displayed/selected in the profile.
- Complete the remainder of the import profile as you normally would and confirm that you have selected one of the following match methods in the Match Profile section (that uses the 035 field):
- Unique OCLC Identifier Match Method
- 024 / 035 Match Method
- Fuzzy Serial Match Method
- ISSN / 024 / 035 Match Method
- 035 (Other System Identifier) Match Method
See http://www.loc.gov/marc/bibliographic/concise/bd035.html for more information regarding the 035$a and 035$z.The job report that results from running this import profile has been updated to note the number of multiple matches resolved related to:- Disregarding canceled/invalid control numbers
- Disregarding bibliographic Community Zone linked records
 Additional Import Job Report Counts for Multiple MatchesThese new counts are a subset of Multi-matches resolved automatically, and their count totals should add up to equal the count total for Multi-matches resolved automatically.
Authority Match Methods
| Field | Description |
|---|---|
| 153 (Classification Number) Match Method | This match can be used when importing classification type records (records that contain call number headings in the 153 field). For example, when working with RVK classification records. |
| 001 to MMS ID Match Method | Matches based on the Alma ID. To be used when importing a record that was previously exported from Alma. |
| 001 To ORIGINATING_SYSTEM_ID Match Method | Matches based on the ID of the authority record. To be used when importing a record from an external system. |
If a matching authority is found according to the defined match method, the authority record will be overlaid with the incoming update.
If a method other than 001 To ORIGINATING_SYSTEM_ID is selected, and no match is found according to the defined method, Alma will check for 001 To ORIGINATING_SYSTEM_ID matches to make sure no duplicate originating system ID exists in the system. If the incoming originating system ID is found in a non-matching authority record, the incoming authority will be rejected to prevent duplications.
Handling Record Redirection
- Matching between the incoming record and the Alma database is done as usual.
- The Canceled record field/Canceled record subfield controls which record(s) are canceled.
Certain institutions need the MD import to update only records that already exist in the institution's catalog, and to skip the non-matched records changes. This is useful for customers of some external catalogs that publish all record changes to all members. Thus the institution needs to get updates only for records that are in use by the institution, so as to not to inflate the Alma repository. (For example, institutions working with the ZDB external catalog.) If this is the case in your institution, select the option "Import Record for Redirection" under the No Match section. When "Import Record for Redirection" is selected, the redirection is performed even if there was no match for the new record in Alma, as long as there was a match for the cancelled record.

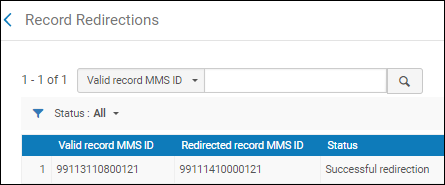
- If there are multiple matching records based on the settings for Serial match method or Non Serial match method in the Import Profile, these records are not processed for redirection, even if the incoming record contains a matching ID in the field/subfield specified in the Canceled record field/Canceled record subfield (such as the 035 $z or the 889 $w).
- For information on configuring Alma to take an identifier from the secondary record and place it in the primary record when merging records, see Configuring BIB Redirection Fields.
Creating/Editing an Import Profile: Set Management Tags
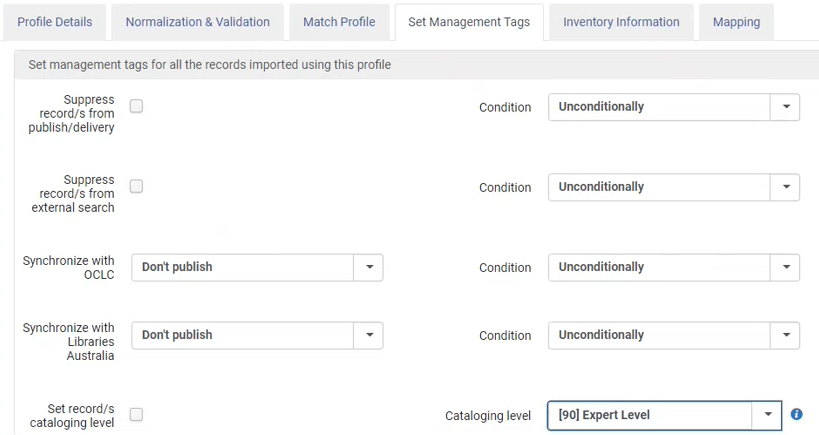
- On the Import Profile Details - Set Management Tags page, enter the following profile details.
Import Profile Details - Set Management Tags Fields Field Description Set Management Tags: ConditionSelect this parameter to indicate that you want imported records to be tagged for suppression from publishing or delivery to Primo.After selecting the Suppress records from publish/delivery parameter, use the Condition parameter to identify the handling of suppression when imported records are merged or overlaid with existing records. Your options are:-
Unconditionally – When this option is selected, all imported records are suppressed, even when the imported records are merged or overlaid with existing records that are unsuppressed. When this case occurs, the unsuppressed tag of the existing record changes to suppressed.Also the opposite is true when the Suppress records from publish/delivery and Unconditionally option combination is not selected and the imported records are merged or overlaid with existing records that are suppressed, the suppressed tag of the existing record changes to unsuppressed.
- Only for new records – When this option is selected and imported records are merged or overlaid with existing records, the suppression status of the existing record will remain the same (suppressed or unsuppressed); and only new records (ones that are not being merged or overlaid with an existing record) will be marked for suppression.
For digital import profiles, suppression does not prevent direct end-user access to the resource. This is controlled only by Access Rights (see Creating/Editing a Digital Import Profile: Inventory Information).When working in the Institution Zone for a network, and the profile is set to Use Network, this functionality will only suppress IZ records. The NZ record will not be suppressed.Suppress record/s from external search Select this parameter to indicate that you want imported records to be tagged for suppression from external searches.After selecting the Suppress records from external search parameter, use the Condition parameter to identify the handling of suppression when imported records are merged or overlaid with existing records. Your options are:-
Unconditionally – When this option is selected, all imported records are suppressed, even when the imported records are merged or overlaid with existing records that are unsuppressed. When this case occurs, the unsuppressed tag of the existing record changes to suppressed.Also the opposite is true when the Suppress records from external search and Unconditionally option combination is not selected and the imported records are merged or overlaid with existing records that are suppressed, the suppressed tag of the existing record changes to unsuppressed.
- Only for new records – When this option is selected and imported records are merged or overlaid with existing records, the suppression status of the existing record will remain the same (suppressed or unsuppressed); and only new records (ones that are not being merged or overlaid with an existing record) will be marked for suppression.
For digital import profiles, suppression does not prevent direct end-user access to the resource. This is controlled only by Access Rights (see Creating/Editing a Digital Import Profile: Inventory Information).Synchronize with OCLC (not relevant for Digital profiles with a target format of Dublin Core)
Condition
Options for synchronizing with the Online Computer Library Center, Inc. (OCLC)
- Publish bibliographic records
- Publish holdings only
- Don’t publish
After selecting the synchronize option, select a condition, either Unconditionally or Only for new records.
Synchronize with Libraries Australia (not relevant for Digital profiles with a target format of Dublin Core)
Condition
Options for synchronizing with the Libraries Australia National Catalog:
- Publish bibliographic records
- Don’t publish
After selecting the synchronize option, select a condition, either Unconditionally or Only for new records.
Set record/s cataloging level Option to define the cataloging level assigned to records imported to Alma using the MD import profile. This field is only relevant to institutions that manage cataloging levels!
The set record/s cataloging level option is only enabled and visible when the cataloging_level_available customer parameter is set to true. In Alma, access the customer parameter via: Configuration Menu > Resources > General > Other Settings. All optional cataloging levels available for the institution are defined in Alma Configuration > Resources > Cataloging > Cataloger Permission Level.
The set record/s cataloging level options' behavior of the Alma import is:
- New records - automatically assigned with the selected cataloging level.
- Matched records:
- If the existing cataloging level is equal to or lower than the cataloging level configured in the import profile - a new cataloging level (configured on the import) is assigned to all matched records as part of the import, i.e. it not only sets the cataloging level but performs the overlay/merge defined on the import profile.
- If the existing cataloging level is higher than the cataloging level configured in the import profile - records are rejected and reported in the import report.
If the set record/s cataloging level option is not checked on the import profile, there is no change in the import logic.
-
-
- If you are editing any type of import profile, select Save when you are done.
- If you are creating a digital import profile, select Next and continue with Creating/Editing a Digital Import Profile: Inventory Information.
- If you are creating a collection import profile, continue with Creating/Editing a Collection Import Profile: Inventory Information.
- Otherwise, select Next and continue with Creating/Editing an Import Profile: Inventory Information.
- Select Save Draft to save the profile as inactive. You can continue creating the import profile by editing it at a later time.
Creating/Editing an Import Profile: Inventory Information
This section describes how to enter import profile inventory information on the Import Profile Details - Inventory Operations page. This page is not relevant for Authority, Initial Authority, or Digital import profiles.
- Access the Inventory Operations portion of the profile wizard or select the Inventory Information tab when editing an import profile.
 Import Profile Details > Inventory Operations tab
 - Select Electronic, Mixed, or Physical to identify the type of inventory you are importing. Additional parameters open for the type of inventory you have selected.
Select None to create a bibliographic record with no inventory. No additional parameters open.
If you are importing electronic inventory, a portfolio will be created for every record from the input file, even if the records have no field 856. In this case, an empty portfolio will be created.
Repository type Import profile is intended to add new portfolios. If Standalone is selected in the import profile, new standalone portfolios will be added regardless of existing portfolios. If existing portfolios part of a collection already exist and "Part of an electronic collection" is selected in the import profile, the existing portfolios linked to that collection will be deleted and replaced by new portfolios. In this case, to add portfolios when portfolios already exist, use the Portfolio loader. -
Configure these parameters to match your requirements, as per the table below:
Import Profile Details - Inventory Operations Field Description E-Book Mapping Delete/deactivate portfolios Indicates how to process portfolios when linked bibliographic records are identified for deletion with a d in position 5 of the leader. This option is available when:
- Creating or modifying Repository or Update Inventory import profiles
- Allow bibliographic record deletion is selected in the Match Profile tab. For more information, see the table in Creating/Editing an Import Profile: Match Profile.
- Part of an electronic collection portfolio type was selected on the current tab, or if the Standalone portfolio type is selected and the profile is a PDA profile.
The Allow bibliographic record deletion option must be selected in order to select Delete/deactivate portfolios. Note that when both Allow bibliographic record deletion and Delete/deactivate portfolios parameters are selected, any single match that is found is deleted. (Multiple matches that are found require manual handling and are identified in the job report.)
Records with related records cannot be deleted using the Allow bibliographic record deletion and the Delete/deactivate portfolios options in the profile.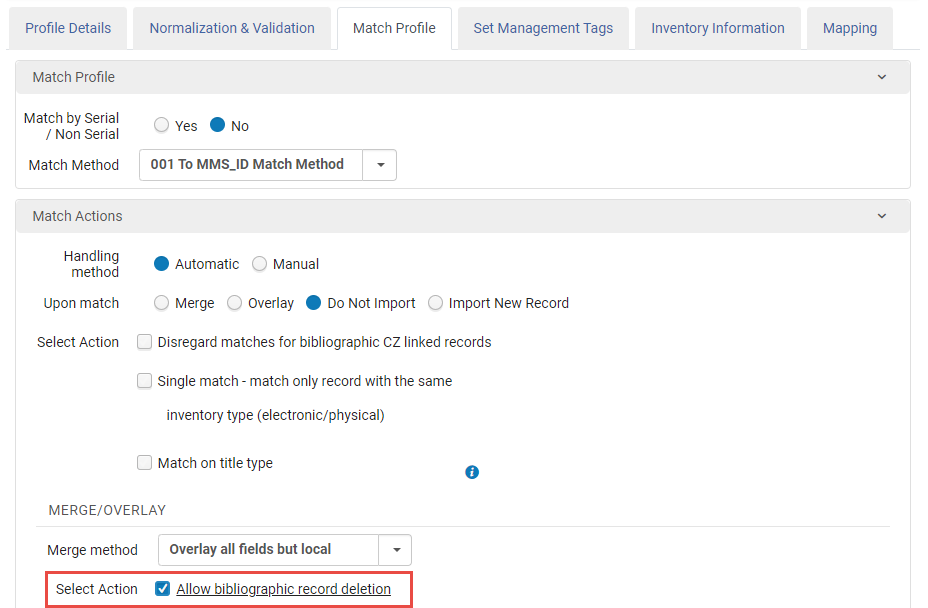 Allow Bibliographic Record Deletion Parameter
A portfolio can be deleted only when there is no PO line connected to it and the portfolio is not associated with a PDA. When Alma tries to delete a portfolio and there is a PO line connected, Alma deactivates the portfolio instead. For more information about electronic portfolios deactivated during the import process, see import reporting.
For information about deactivating/deleting electronic portfolios by running an import job, see the Delete/Deactivate and Electronic Portfolio Using Import Profile video (7:39 min).
Use Community Zone Portfolios Select to match each bibliographic record against the bibliographic records that have portfolios that are part of the collection activated from CZ.
- If a matching bibliographic record is found, Alma imports the relevant portfolio to the collection selected in the profile.
Alma does not activate this portfolio. You can activate it at any time. To activate upon import, click the "Activate resource" checkbox.
- If a matching bib record is found, its information is taken from the Community Zone. The information filled in the following fields is ignored:
- Extract portfolio information from field
- Extract access URL from field
- Extract interface name from field
- Extract internal description note from field
- Extract authentication note from field
- Extract public note from field Extract library from field
- If a matching bibliographic record is not found - Alma creates a local portfolio that is associated to the CZ collection.
- If multiple bibliographic records are found as a match in the CZ under the specific collection – no import takes place. The record is reported in the "Resolve import issues" list.
Portfolio type - Select Standalone if the records your are importing are standalone portfolio (not grouped into an electronic collection). When you select this option, the below additional parameters open:
- Material Type
- Enable Proxy
- Multiple portfolio/Single portfolio
When linking a standalone portfolio that has a library set to an electronic collection that has a library set, the portfolio's library is deleted. When the library of the standalone portfolio and the library of the destination electronic collection are different, a warning is displayed on the collection selecting popup (see below): "The portfolio you are about to attach has a different library definition than the selected electronic collection.Once confirmed, the portfolio will inherit the electronic collection's library definition. Note that this action cannot be reversed." For details, see Library set on electronic resource.
- Select Part of an electronic collection if the records your are importing are part of an electronic collection. When you select this option, the below additional parameters open:
- Electronic Collection - The selection screen where you need to select the electronic collection displays all collections, but allows selecting only the collections that match your role scope(s). For details, see Library set on electronic resource.
- Service
- Material Type
- Multiple portfolio/Single portfolio
For Update Inventory import profile select Standalone when updating standalone portfolios, and Part of an electronic collection when updating portfolios that are already part of that collection. Otherwise, the PO lines will be skipped. See Configuring the Update Inventory Import Profile.
Material Type Indicate the material type of the electronic resources you are importing (such as Book, CD-ROM, Dissertation, Journal, Musical Score). Enable Proxy (for Standalone portfolios) Select True to enable a proxy to which to redirect the URL. The default is False.
For Part of an electronic collection, this field is hidden. Enable the proxy at the electronic collection level.
Electronic Collection (for Part of an electronic collection portfolios) Indicate the electronic collection to which to import the portfolios. Once selected, Alma refreshes the Service option to display the relevant services for the selected collection. Service (for Part of an electronic collection portfolios) Select the appropriate electronic collection service.
All electronic titles in the import file must belong to the same electronic collection service.
Multiple portfolio/Single portfolio When importing a record with multiple 856 $u fields (which represents the portfolio's URL), indicate here how to create portfolios:
- Single Portfolio - Select to create one portfolio (randomly selected URL).
- Multiple Portfolios - Select to create one portfolio for each URL.
Standalone imports cannot be imported to multiple portfolio. They can only be imported into single portfolio.
Create inventory only for new bibliographic records
This option is available for Repository type import profiles.
Select to add electronic inventory records only when new bibliographic records are created as part of the import job.
When you select this option, the import job first processes the input file and handles validation, normalization, and matching. At the end of all this normal processing, the system notes the new bibliographic records that were created during the job, and creates electronic inventory only for these records.
Note that records that are modified as a result of the import job, such as with match processing, are not considered new records.
Extract portfolio information from field (for Multiple portfolio only) Here you indicate the MARC field used as the source for gathering information for multiple portfolios.
This field does not appear for single portfolio. For single portfolios, field information can be extracted from different fields.Enter the field number in which the portfolio information appears. When you enter the field number, the "Field" for all parameters is populated automatically with this value.
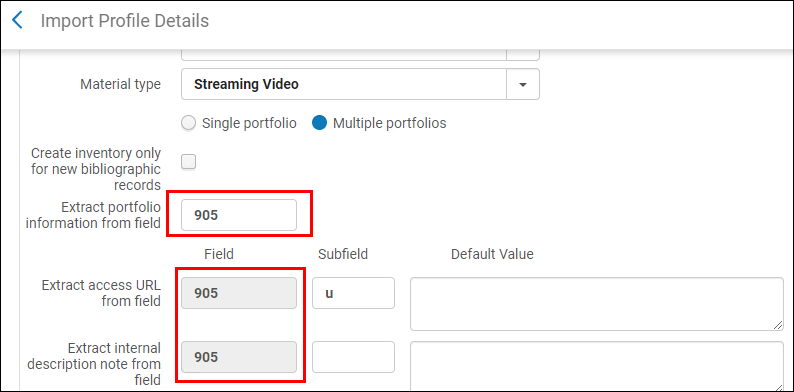
Extract access URL from field (for Multiple portfolio only) - Indicate the field/subfield combination that contains the e-Book URL. Use the Indicators to skip field for multiple portfolios only. To have Alma skip fields based on indicators, use indicator pairs separated by commas.
For single portfolios, a random 856 URL field is used. - Under "Default value", indicate the e-Book URL that will be mapped by default if the URL is empty or if an incorrect value is indicated in the input file.
The "#" symbol is to be used for an empty indicator.
Extract interface name from field (for Standalone portfolio types only) - Indicate the MARC field and/or subfield from which to take the interface name.
- Under "Default value", indicate the default field if the interface name field in the record is empty or if an incorrect value is indicated in the input file. Select the search icon to select from a list of available vendors.
Extract internal description note from field - Indicate the source record’s field/subfield that contains the internal description note.
- Under "Default value", indicate the internal description note that will be mapped by default if the note is empty or if an incorrect value is indicated in the input file.
Extract authentication note from field - Indicate the source record’s field/subfield that contains the authentication note.
- Under "Default value", indicate the authentication note that will be mapped by default if the note is empty or if an incorrect value is indicated in the input file.
Extract public note from field - Indicate the source record’s field/subfield that contains the authentication note.
- Under "Default value", indicate the public note that will be mapped by default if the note is empty or if an incorrect value is indicated in the input file.
Extract available for from field - Indicate the source record’s field/subfield that contains the "Available for" groups for the portfolio.
- Under "Default value", indicate the "Available for" group to be set by default, if not specified in the input file.
Extract library from field - Indicate the source record’s field/subfield that contains the library.
The following happens during import (For details, see Library set on electronic resource):Currently this only happens when using the "Repository" import profile type.
- Standalone portfolios are imported/created.
- If the extracted library matches the library set on the electronic collection of the portfolio, then the portfolio is imported/created.
- If the extracted library does not match the library set on the electronic collection of the portfolio, the portfolio is skipped. The report's counter for portfolios skipped due to library mismatch is "Electronic portfolio skipped due to library conflict with the electronic collection library".
- If there is no library value to be extracted from the field, the portfolio is imported/created.
- If the extracted library does not match any existing library due to a typo, then the job takes the library from the "Default library" field.
- Under "Default value", select the library that will be mapped by default if the library is empty or if an incorrect value is indicated in the input file.
License Select the license to apply to the imported portfolios. Activate resource Select whether to automatically activate the resource once it is imported. Physical Mapping New
(appears if you select Physical or Mixed for inventory operations)
Item Creation Policy
Use this parameter to indicate what type of inventory to create:
- Select Create items and holdings (default option) to create both items and holdings records OR only items for existing holdings records.
- Select Create holdings only to create only holdings records.
Depending on the option that you select, your configuration parameters change.
When you select the Create holdings only option, complete the Item information field parameter and confirm that the input file(s) only contain Library and Location subfields.
For more information, see the Import Holdings Only, Without Items video (2:00 min.).
Material type Select the material type from the list of material types for physical resources (such as Art Original, Audiobook, Book, DVD, Transparency). Item information field
Here you indicate the field from which you want to map item-level information from the input files.
- Enter the field number if, in the input file, all of the item information is contained in a specific field, and the item's attributes are contained in the subfields of that field. When you enter the field number, the "Field" for all parameters is populated automatically with this value (besides the "Number of items" parameter - see below).
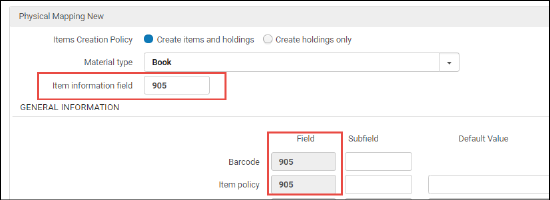
- Leave blank if, in the input file, the item information for a given item is dispersed across several fields. In this case, the "Field" for all parameters is left blank, and you will be able to populate the "Field" for each parameter with the relevant value.
General Information Barcode The field/subfield that contains the barcode. If you are also changing the item policy, this field is required. Copy ID - Indicate the field/subfield that contains the item’s copy ID to identify individual copies of the same title when multiple copies exist at the same location.
- Under "Default value", indicate the item’s copy ID that is mapped by default if the item’s copy ID is empty or if an incorrect value is indicated in the input file.
Item policy - Indicate the field/subfield that contains the item's policy. To change an item policy, the barcode must also be included. This is because different item policies may apply to different items in different locations.
- Under "Default value", indicate the item policy that will be mapped by default if the item's policy is empty or if an incorrect value is indicated in the input file.
Number of items This field is enabled only when the "Item information field" is empty. Enter the number of items included in the input file that you are uploading.
When the "Item information field" is populated, this field is disabled.Provenance - Indicate the field/subfield that contains the provenance code indicating the item’s origin.
- Under "Default value", indicate the provenance code that is mapped by default if the provenance code is empty or if an incorrect value is indicated in the input file.
Is Magnetic - Indicate the field/subfield that contains the information on whether the item is magnetic or not.
- Under "Default value", indicate the item call number type that is mapped by default if the item call number type is empty or if an incorrect value is indicated in the input file.
- In the input file, indicate the values as True/False.
Receiving date - Indicate the field/subfield that contains the date the material was received/activated for the first time.
- Under "Default value", indicate the receiving date that is mapped by default if the receiving date is empty or if an incorrect value is indicated in the input file.
- In the input file, indicate the date in the format yyyyMMdd.
Expected receiving date - Indicate the field/subfield that contains the date the item was expected to be received.
If you set an expected receiving date for the resource, but it has a POL and that POL is sent to the vendor, the expected receiving date set here will change to that of the POL. For details, see Approving and Sending POs.
- Under "Default value", indicate the expected receiving date that is mapped by default if the expected receiving date is empty or if an incorrect value is indicated in the input file.
- In the input file, indicate the date in the format yyyyMMdd.
Pages - Indicate the field/subfield that contains the item’s number of pages.
- Under "Default value", indicate the number of pages that is mapped by default if the number of pages is empty or if an incorrect value is indicated in the input file.
Pieces - Indicate the field/subfield that contains the item’s number of pieces.
- Under "Default value", indicate the number of pieces that is mapped by default if the number of pieces is empty or if an incorrect value is indicated in the input file.
Replacement cost - Indicate the field/subfield that contains the charge administered to the patron if the item is lost.
- Under "Default value", indicate the replacement cost that is mapped by default if the replacement cost is empty or if an incorrect value is indicated in the input file.
Inventory Numbers: Inventory Number - Indicate the field/subfield that contains the inventory number for this physical item.
- Under "Default value", indicate the inventory number that is mapped by default if the inventory number is empty or if an incorrect value is indicated in the input file, up to 20 characters.
Inventory Date
- Indicate the field/subfield that contains the inventory date.
- Under "Default value", indicate the inventory date that is mapped by default if the inventory date is empty or if an incorrect value is indicated in the input file.
- In the input file, indicate the date in the format yyyyMMdd.
Inventory Price - Indicate the field/subfield that contains the price of the item.
- Under "Default value", indicate the item price that is mapped by default if the item price is empty or if an incorrect value is indicated in the input file. For values less than 1, enter a leading 0: 0.44, not .44.
Permanent Location Library - Indicate the field/subfield that contains the library information.
If the input file of bibliographic records contains your library code, you can map it here (for example, if the vendor is sending bibliographic records with your library code in the 999 $x).
If the vendor is using EOD, this field/subfield indicates the library for which the material referenced in the EOD and resulting PO lines will be ordered. - Under "Default value", indicate the library that is mapped by default if the item's library information is empty or if an incorrect value is indicated in the input file, or if you are not using the Library field to map. This the default library will be used for either regular or EOD imports.
If you are using EOD, the default library for which the material referenced in the EOD and resulting PO lines will be ordered. Select the search icon to select a library from the available list of libraries.
Location - Indicate the field/subfield that contains the location information.
- Under "Default value", indicate the location that is mapped by default if you are not using the Library field to map, or if the data is not found in the mapped Library field. This default library will be used for either regular or EOD imports. This field becomes enabled once you have selected the library.
If you are using EOD, the default library for which the material referenced in the EOD and resulting PO lines will be ordered. Select the search icon to select a library from the available list of libraries.
Map library/location
Select to map the library location. If you select this option, you must enter Location Mapping in the Mapping tab after you save the inventory information.

The Source value displays the value (from the input file) of the subfield as defined in Inventory Information > Permanent Location > Location field. Location is where the institution locations are grouped by the libraries.
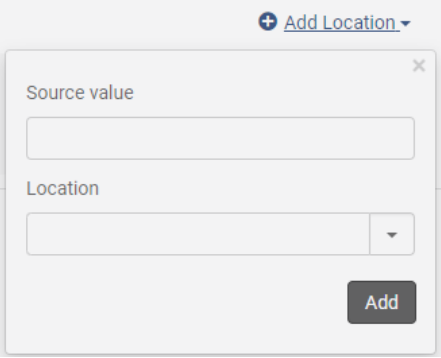
Item call number - Indicate the field/subfield that contains the item call number.
- Under "Default value", indicate the item call number that is mapped by default if the item call number is empty or if an incorrect value is indicated in the input file.
Item call number type - Indicate the field/subfield that contains the item call number type.
- Under "Default value", indicate the item call number type that is mapped by default if the item call number type is empty or if an incorrect value is indicated in the input file.
Temporary Location Temporary library - Indicate the field/subfield that contains the temporary library information.
- Under "Default value", indicate the temporary library that is mapped by default if the item's library information is empty or if an incorrect value is indicated in the input file.
Temporary location - Indicate the field/subfield that contains the temporary location information.
- Under "Default value", indicate the temporary location that is mapped by default if the item's location information is empty or if an incorrect value is indicated in the input file. This field becomes enabled once you have selected the temporary library.
Map temporary library/location Select if you want to map the library location. If you select this option, you must enter the Location Mapping in the Mapping tab.
Temporary call number - Indicate the field/subfield that contains the temporary call number.
- Under "Default value", indicate the temporary call number that is mapped by default if the item's call number information is empty or if an incorrect value is indicated in the input file.
Temporary call number type - Indicate the field/subfield that contains the temporary call number type.
- Under "Default value", indicate the temporary call number type that is mapped by default if the item's temporary call number type is empty or if an incorrect value is indicated in the input file.
Temporary item policy - Indicate the field/subfield that contains the temporary item policy.
- Under "Default value", indicate the temporary item policy that is mapped by default if the item's item policy is empty or if an incorrect value is indicated in the input file.
Due Back Date- Indicate the field/subfield that contains the date the item is due back from the lender.
- Under "Default value", indicate the due back date that is mapped by default if the due back date is empty or if an incorrect value is indicated in the input file.
- In the input file, indicate the date in the format yyyyMMdd.
Retention Information Committed to Retain - Indicate the field/subfield that contains the indication of whether the item is committed to retain. In the input file, the value should be indicated as true/false (Yes/No).
- Under "Default value", indicate the value that is mapped by default if the field/subfield is empty or if an incorrect value is indicated in the input file.
Retention Reason - Indicate the field/subfield that contains the item's retention reason.
- Under "Default value", indicate the retention reason that is mapped by default if the retention reason is empty or if an incorrect value is indicated in the input file.
Retention Note - Indicate the field/subfield that contains the item's retention note.
- Under "Default value", indicate the retention note that is mapped by default if the retention note is empty.
For more information on Retention Information, see Retention Reason. ENUM/CHRON Information Year of issue - Indicate the field/subfield that contains the year of issue.
- Under "Default value", indicate the year of issue that is mapped by default if the item's year of issue is empty or if an incorrect value is indicated in the input file.
Enumeration A, B, and C - Indicate the field/subfield that contain the enumerations.
- Under "Default value", indicate the enumerations that are mapped by default if the item's enumerations are empty or if an incorrect value is indicated in the input file.
Chronology I, J, K - Indicate the field/subfield that contain the chronologies.
- Under "Default value", indicate the chronologies that are mapped by default if the item's chronologies are empty or if an incorrect value is indicated in the input file.
Description - Indicate the field/subfield that contains the description.
- Under "Default item policy", indicate the description that is mapped by default if the item's description is empty or if an incorrect value is indicated in the input file.
Notes Public note - Indicate the field/subfield that contains the public note.
- Under "Default value" you may indicate a note that is mapped by default if the item's public note information is empty.
Fulfillment note - Indicate the field/subfield that contains the fulfillment note.
- Under "Default value" you may indicate a note that is mapped by default if the item's fulfillment note information is empty.
Internal note 1, 2, and 3 - Indicate the field/subfield that contains the relevant internal note.
- Under "Default value" you may indicate a note that is mapped by default if the item's relevant internal note information is empty.
Statistics note 1, 2, and 3 - Indicate the field/subfield that contains the relevant statistics note.
- Under "Default value" you may indicate a note that is mapped by default if the item's relevant statistics note information is empty.
(appears if you select Physical or Mixed for inventory operations for Update Inventory and Repository import profiles)
Use this functionality to identify the mapping of fields from the incoming/imported bibliographic record to the fields of the new holdings record that you want created in Alma. If you use this feature, multiple holdings records or multiple item records are not produced. Select Add Holdings Mapping to enter the following mapping and then select Add Row.
- Input Record Tag/Subfields – Enter the source location in the imported records for the holdings information.
- Holdings Record Tag/Subfields – Enter the target location in the Alma holdings record for storing the holdings information.
It is not possible to map indicators via the Add Holdings Mapping functionality.
It is possible to enter multiple subfields in a single entry.
► To map multiple subfields in a single line in the mapping table, use commas to separate the subfields.
The number of subfields in the input file should match the number of subfields in the holdings record. If the numbers do not match, an error message appears.When you select Add Row, Alma validates that you entered a proper mapping.
The library and location fields/subfields configured in the Physical Mapping section of the Inventory Operation page are mapped to the 852 $b and $c in the holdings record. If this mapping does not exist, the default library and location values that you defined in the Physical Mapping section are used. Since the 852 $b and $c in the holdings record is handled by these bibliographic field/subfield, you do not need to separately map the 852 $b and $c in the Holdings Records Mapping section. If you attempt to do this, Alma prompts you with a validation error.
If more than one tag needs to be mapped, repeat the Add Holdings Mapping process to add more mapping rows. When more than one mapping row is entered, they can be entered in any order. The order of the fields is ignored.
When you run your import, one holdings record will be created for each incoming bibliographic record.
Updating or overlaying existing holdings records is not supported.
Update holdings call number Select this option to enable the update of a holdings record with the call number that is part of an imported bibliographic record. This option controls the mapping of fields to the 852. When this option is selected, its mapping is used in addition to the mapping defined in the Holdings Records Mapping section of the import profile. It will override any duplicate mapping that may be defined in the Holdings Records Mapping section.
Inventory Handling (appears if you select Physical or Mixed for inventory operations for Update Inventory import profiles)
Receive Item? This option is only relevant for "Update Inventory" import profile. When selected, the items are received but are kept in the department and must still be scanned in and marked done in Acquisitions > Post-Receiving Processing > Scan. Alma treats this as a work order. If not selected, the items are not kept in the department but must still be received in Acquisitions > Receiving and Processing > Receive. Once received, they are put in transit until scanned in at the circulation desk.
-
If you are creating a repository import profile or editing any type of import profile, use one of the following steps to finish the Inventory Operations portion of the profile:
- Select Save when you are done.
- Otherwise, select Next and continue with Creating/Editing an Import Profile: PO Line Information.
- Select Save Draft to save the profile as inactive. You can continue creating the import profile it at a later time.
Creating/Editing a Digital Import Profile: Inventory Information
- On the Digital Import Profile Details - Bibliographic Record Level page, enter the following information.
Digital Import Profile Details - Inventory Information Field Description Default Collection (all profiles) The name of the default collection to which the imported records are assigned. For information on configuring collections, see Adding a Top Level Collection. Remote digital import profiles whose target format is NOT Dublin Core (for example, MARC 21) 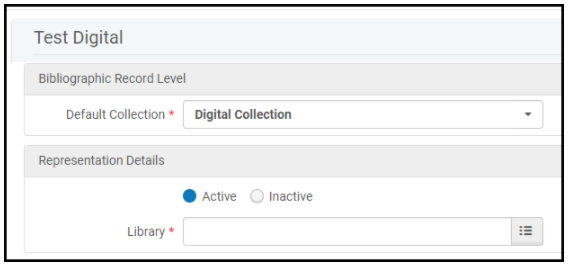
Representation Details Use this section to add representation details to apply to each record in the import profile.Active / Inactive Select Active or Inactive to determine if the representation is discoverable. Library The library that will own the created representations. Remote digital import profiles whose target format is Dublin Core 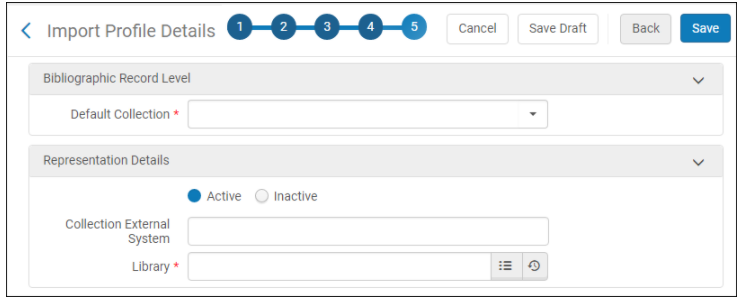
Active / Inactive Select Active or Inactive to determine if the representation is discoverable. Collection External System When imported records contain an external ID but no external system, this field provides a constant value used to match an existing collection's external system. Library The library that will own the created representations. Alma (Non-remote) digital import profiles whose physical source is XML and whose target format is NOT Dublin Core (for example, MARC 21) 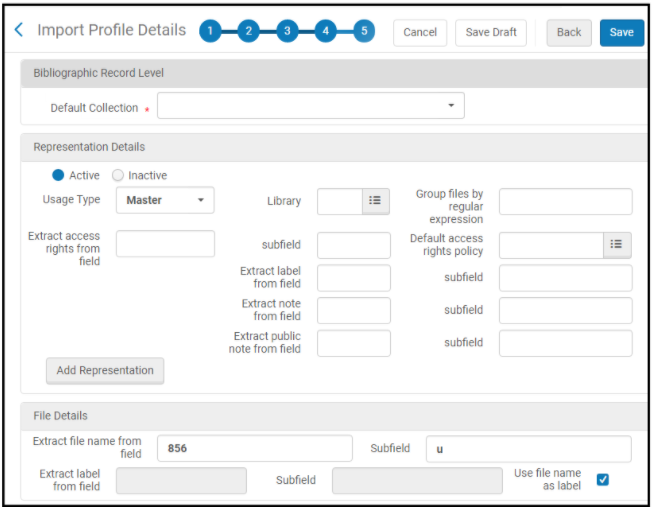
Representation Details Use this section to add representation details to apply to each record in the import profile.Active / Inactive Select Active or Inactive to determine if the representation is discoverable. Usage Type Primary or Derivative. Library The library that will own the created representations. Group files by Select an option by which to group files: All representations must be grouped by the same method.- Regular expression – enter a regular expression with which to group files into different representations. For example, enter \.jpeg$ to include only jpg files in the representation. If this value field is left empty, all files are grouped together in one representation.
- Subfield $8 Linking Number – Group files according to the 856 $8 linking number in the bibliographic record.
Extract access rights from field/subfield The field and subfield from which to extract the access rights policy name to assign to the representation. If this information is not available in the record or if all representations created by this profile will be assigned the same policy, use the Default access rights policy field. Default access rights policy The default access rights policy for when there is no access rights policy reference in the metadata record. To configure these, see Configuring Access Rights Policies for Digital Objects. Extract label from field/subfield The field and subfield from which to extract the representation label. Extract note from field/subfield The field and subfield (repeatable)from which to extract the internal representation notes. Extract public note from field/subfield The field and subfield from which to extract the representation public note. Representation public notes appear in the View It services page. Add Representation Select to add the representation details to the import profile. The added details appear beneath this section in a table, one per line. Repeat the process to create additional representations per record. To remove one of the lines, select Delete in the line. File Details Use this section to add file name details to apply to each record in the import profile.Extract file name / label from field/subfield The field and subfield from which to extract the file name and label. File labels appear in the viewer Table of Contents when a representation contains multiple files). Use file name as label Select to use the file name as the label. Alma (Non-remote) digital import profiles whose physical source is XML and whose target format is Dublin Core 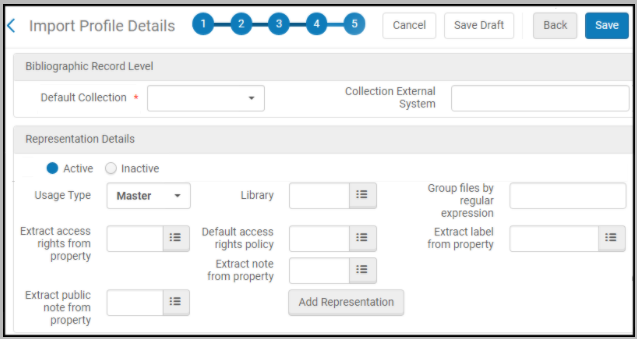
Collection External System When imported records contain an external ID but no external system, this field provides a constant value used to match an existing collection's external system. Representation Details Use this section to add representation details to apply to each record in the import profile. See above for a description of the fields.Imported DC records should reference the files in their respective dc:identifier fields. The file label is taken from the file name.Alma (Non-remote) digital import profiles whose physical source format is MODS 
Representation Details Use this section to add representation details to apply to each record in the import profile. See above for a description of the fields.Imported MODS records should reference the files in /mods/location/url and the label in /mods/location/url[@displayLabel]. If you do not provide a label, the filename is used for the label.Alma (Non-remote) digital import profiles whose physical source format is CSV 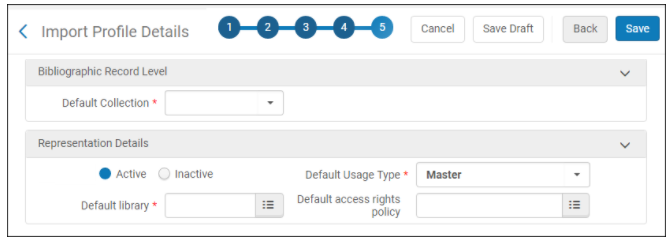
Representation Details Use this section to add representation details to apply to each record in the import profile.Active / Inactive Select Active or Inactive to determine if the representation is discoverable. Default Usage Type Primary or Derivative. Default Library The library that will own the created representations. Default access rights policy The default access rights policy. To configure these, see Configuring Access Rights Policies for Digital Objects. -
- Select Save when you are done.
- Select Save Draft to save the profile as inactive. You can continue creating the import profile by editing it at a later time.
Collection Assignment
Creating/Editing a Collection Import Profile: Inventory Information
- On the Collection Import Profile Details - Inventory Information Level page, enter the following information.
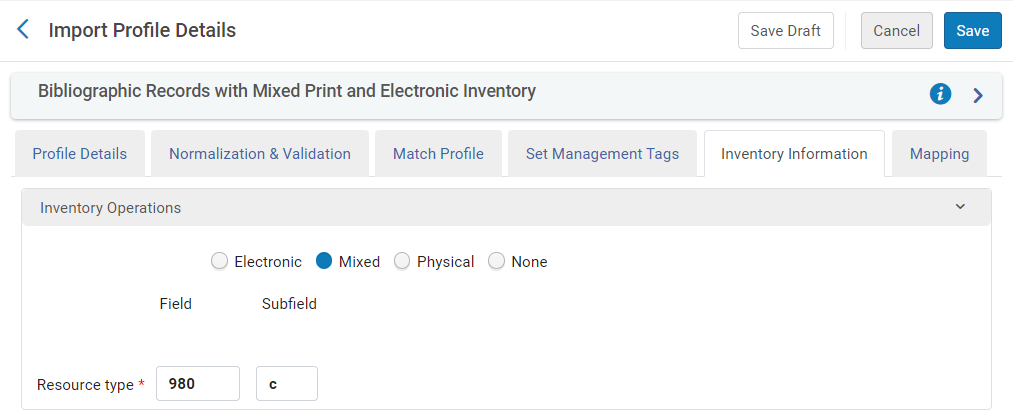 Collection Import Profile Details - Inventory Information Level
Collection Import Profile Details - Inventory Information Level Fields Field Description Inventory Operations Alma determines the source record's inventory type using the Inventory Operations field: - None - No preference based on inventory.
- Physical - The preference is based on physical inventory.
- Electronic - The preference is based on electronic inventory.
- Mixed - The inventory type (electronic or physical) is determined for each bibliographic record according to the mapping of the Resource type field.
For example, if the Resource type field is 888 $d, each record in the input file should include:- <datafield tag="888" ind2=" " ind1=" "> <subfield code="d">P</subfield> </datafield>
- OR <datafield tag="888" ind2=" " ind1=" "><subfield code="d">E</subfield></datafield>
Alma determines the inventory type for each matching record as follows:
- If the matching record includes both physical and electronic inventory, the inventory is considered to be mixed.
- If the matching record includes only physical or electronic inventory, the inventory of the matched record is considered to be of that type of inventory.
- If only one of the matching records contains the same inventory type as the source (electronic or physical records), it will be considered a match. If there are multiple matching records that contain the same inventory type as the source, no preference will be based on inventory type.
- If only one of the matching records contains mixed inventory, and there are no matching records that contain only electronic or physical records, the mixed record will be considered a match. Otherwise, no preference will be based on inventory type.
- Select Save when you are done.
- Select Save Draft to save the profile as inactive. You can continue creating the import profile by editing it at a later time.
Bulk Collection Import
Creating/Editing an Import Profile: PO Line Information
.png?revision=1)
- On the Import Profile Details - PO Line Information page, enter the following information:
All of the fields are relevant for New Order import profiles. Most fields are not relevant for Update Inventory profiles; relevant fields are noted. If the field is not noted, it is relevant only for New Order profiles.
Import Profile Details - PO Line Information Fields Section Field Description EOD General Parameters Electronic PO line type (Electronic or Mixed inventory operation only; required) The type of electronic material for the PO line. For a detailed explanation of the PO line types and their ramifications for the order workflow and inventory, see Explanation of Purchase Types Workflow and Inventory. Physical PO line type (Physical or Mixed inventory operation only; required) The type of physical material for the PO line. For a detailed explanation of the PO line types and their ramifications for the order workflow and inventory, see Explanation of Purchase Types Workflow and Inventory. Multiple vendors (also Update Inventory types) Select to configure New Order import profiles for multiple vendors. This is necessary for cases in which an order is fulfilled by a third party that sends the order to multiple vendors. Configuring New Order import profiles for multiple vendors allows Alma to read EOD files that contain data from multiple vendors. When selected, the Map vendors check box and Vendor field and subfield fields appear. For more information on Multiple Vendors, see the Multiple Vendors in EOD Import File video (8:56 min).Map vendors (multiple vendors; also Update Inventory types) Appears when Multiple vendors is selected. Select to map the vendor name as it appears in Alma with the vendor name as it appears in the EOD file. If you select this check box, you must enter the Vendor Mapping after you save the import profile. To map the vendors:- Go to the Mapping tab. Under Vendor Mapping, enter the Source value, which is the vendor code in the input file.
- Search for and select the correct vendor.
- Select the correct vendor account.
- Select Add to add the vendor mapping.
 Vendor mapping
Vendor field/subfield (multiple vendors; also Update Inventory types) Appears when Multiple vendors is selected. Enter the vendor field and subfield numbers that indicate where in the EOD file the vendor names are located. Vendor account field/subfield (multiple vendors) Appears when Multiple vendors is selected. Enter the vendor account field and subfield numbers that indicate where in the EOD file the vendor account is located. Vendor (also Update Inventory types) The vendor to whom the PO is eventually sent. This field is disabled if Multiple vendors is selected. Vendor account The vendor account used by the vendor. This field is disabled if Multiple vendors is selected (or if a vendor is not selected). PO line currency The currency for the PO line. Decimal point location The location of the decimal point in the price of the material for the PO line. For example, if your vendor enters the price as "1000" for $10.00, enter 2 decimals. If they enter the price as "10.00," leave the decimal location at 0. Acquisition method The type of acquisition method for the PO line. For detailed information on acquisition methods, see Acquisition Methods. Split PO Lines by Library Location The Split PO Lines by Library Location checkbox controls how Alma will behave once a file is imported via the "New order" import profile.
There are 2 options for this checkbox:
1. Checkbox is unchecked (Default) — Alma checks the imported file and creates a single PO line with the number of items according to the number of locations specified on the imported file.2. Checkbox is checked — Alma reviews the imported file and creates a PO line for each location on the file. For example, a file can contain a single record with two locations and two PO line information sections. Using the indicators on the file, Alma associates the relevant location to the relevant PO line. If the file does not contain POL information for each item, or the file does not contain a location (item) for each POL, then the default value in the Import Profile (if exists) will be used.
Note that the PO number field should be empty because two PO lines with different owning libraries cannot be under the same PO. In the imported file, all inventory information should be included in the same field and not split across several fields. The same applies to POL information.
This checkbox only appears for "Physical" and "Mixed" import profiles.
EOD Mapping Additional PO Line reference field/subfield (also Update Inventory types) Map these fields to the appropriate EOD field/subfield as described in Embedded Order Data (EOD) Field Mapping. The PO Line and Vendor reference number fields can be used as match points for vendor orders containing updates to inventory.mappingVendor reference number field/subfield (also Update Inventory types) Vendor reference number type field/subfield List price field/subfield Vendor title number field/subfield Volume part number field/subfield PO number field/subfield PO line owner field/subfield Default PO line owner The organization unit responsible for the PO line. Select Find to select an organizational unit from the displayed list of organizational units. Map Owner If you select this checkbox, map the "PO Line Owner" field and subfield to the appropriate "EOD" field/subfield, then go to the Mapping tab of the profile, and in the "Location" mapping section, map each possible input value for the Alma library. The Library that is used for "Location" mapping will be used for the Owner. Fund distribution field Map these fields to the appropriate EOD field/subfield as described in Embedded Order Data (EOD) Field Mapping. Name subfield Percent subfield Default fund The fund funding the PO. Map funds Select this to map the fund as it appears in the EOD file (MARC field and subfield) to the fund as it appears in Alma. If you select this check box, you must enter Fund Mapping in the Mapping tab before you save the import profile.
1st reporting code/subfield and Default 2nd reporting code/subfield3rd reporting code/subfield4th reporting code/subfield
5th reporting code/subfield
Map these fields to the appropriate EOD field/subfield as described in Embedded Order Data (EOD) Field Mapping. The mapping must be agreed upon between you and the vendor.
Interested users field/subfield These are the field/subfield that map the interested users from the input file. Valid values are the user's primary identifier or the user's email address.
PO Lines created via EOD enable control over the interested users options "Notify user upon receiving/activation", "Notify upon cancelation" and "Hold item". For more information, see the section on Interested users in Manually Creating a PO Line.
Vendor invoice number field/subfield (also update inventory types) The Vendor invoice number field/subfield. Note field/subfield The Note field/subfield. Rush request/subfield The MARC field/subfield that determine that the order should be treated as a rush. Valid values for a rush order are Yes, Y, y, TRUE, True, affirmative. Routing request/subfield The MARC field/subfield that determine that the order should be routed. Valid values for routing the item associated with this order are Yes, Y, y, TRUE, True, affirmative. Binding Request/subfield The MARC field/subfield that determine that the order should be bound. Valid values for a binding the item associated with this order are Yes, Y, y, TRUE, True, affirmative. Receiving note/subfield The MARC field/subfield that contains the text of the receiving note for the EOD. Note to vendor The MARC field/subfield that contains the text of a note for the vendor. This field maps to the PO line Notes tab. Ordered ISBN/ISSN / subfield The ISBN/ISSN field/subfield that contains the identifier for the item you are mapping in the EOD. The identifier that is referenced by this field appears on the PO Line Summary page (see PO Line Summary Page – Electronic Item in Manually Creating a PO Line).Do not create electronic activation task (electronic or mixed inventory only) If selected, when the PO line is created and sent to the vendor, Alma does not create an activation task. If the resource is active, the PO line continues its workflow without waiting for the activation task to complete. Require Manual Review Set to True to stop PO line for review when the PO line is created via EOD. Valid values are Yes, Y, y, TRUE, True, affirmative. Locate existing resource When a PO line is created via the "New order" import profile, you can have Alma locate and use existing inventory and associate the newly created PO line to it. Select this checkbox to have Alma locate an existing resource under the matched bibliographic record, according to portfolio type:
When the portfolio is part of an electronic collection:- If a matching portfolio was found under the specified collection, Alma creates the PO Line as its Main order.
- If the existing portfolio already has a Main order, Alma changes that existing Main order to an Additional order and created the new portfolio as the Main order.
- If no matching portfolio was found under the collection, Alma creates the portfolio as part of the PO Line creation and makes the PO Line its Main order.
- If a matching portfolio was found under the bibliographic record, alma creates the PO Line as its Main order.
- If the existing portfolio already has a Main order, Alma changes that existing Main order to an Additional order and created the new portfolio as the Main order (as above).
- If the portfolio does not exist under the bibliographic record, Alma creates the portfolio and associates the order to it as the Main PO Line line.
- If there are several matching resources under the matched bibliographic record:
- Alma creates the PO Line and sets it to "In Review".
- The PO Line does not have any resource associated with it
- A new message appears in the Alerts tab: "Upon import, multiple records existed under the bib record – POL was created without resource".
- The types of PO Lines that were created with no resource and are 'In Review' are displayed in the import's job report.
When enabling the Create inventory only for new bibliographic records checkbox, make sure not to have it enabled with the locate existing resource option under the “EOD mapping” sections. This could cause failures.
-
- Select Save when you are done.
- Select Save Draft to save the profile as inactive. You can continue creating the import profile by editing it at a later time.
Embedded Order Data (EOD) Field Mapping
| Source Field | Target Field in PO Line | Data Restriction |
|---|---|---|
| 949‡1 | Standard number type | Currently ISBN, ISSN, or ISAN |
| 949‡2 | Standard number | Free text |
| 949‡3 | Vendor title number | Free text |
| 949‡4 | Vendor reference number type | Valid type from code table vendor reference number type |
| 949‡5 | Vendor reference number | Free text, optional |
| 949‡a | Volume/part number | Free text, optional |
| 949‡b | PO line reference | For new orders, cannot be the same reference as an already existing PO line at the same organizational unit. For Update Inventory, this should match the PO line whose shelf-ready inventory you want to update. |
| 949‡c | PO number | Free text |
| 949‡d | Note | Free text |
| 949‡e | Reporting code | Value must be synchronized between vendor and institution |
| 949‡f | Needed by date | Valid date. For example: 2010-09-30 |
| 949‡g | Interested users | Value must be synchronized between vendor and institution: primary or locally configured identifiers, either username or email. Case sensitive. |
| 949‡h | PO line type | Valid type taken from the PO Line Type table. For example, DVD |
| 949‡i | DVD format | Free text |
| 949‡j | DVD region code | Free text |
| 949‡k | Vendor invoice number | Value must be synchronized between vendor and institution
All PO lines with the same vendor invoice number are packaged in the same PO, regardless of any packaging rules. If a PO already exists with this vendor invoice number, the PO lines are added to this PO.
|
| 949‡l | Secondary reporting code | Value must be synchronized between vendor and institution |
| 949‡m | Vendor account | Valid vendor account code |
| 949‡n | Binding | Free text |
| 949‡o | Quantity (repeatable) (required) |
Number, quantity, and locations are repeated in couples. |
| 949‡p | Tertiary reporting code | Value must be synchronized between vendor and institution |
| 949‡r | Rush Yes or No | Used to specify when it is a rush order. Yes means process the order on a rush basis. |
| 949‡s | List price | Number with decimal point. For example, 27.90 |
| 949‡t | Physical shelving location (repeatable) | Valid location code |
| 949‡u | Fund code | Valid fund code (case-sensitive) |
| 949‡v | Vendor | Valid vendor code |
| 949‡w | Percent | Number |
| 949‡x | Ownership (required) |
Valid organizational unit code |
- If a 949 field contains a ‡1, it must contain a ‡2, and vice versa.
- If a 949 field contains a ‡4, it must contain a subfield ‡5, and vice versa.
- If a 949 field contains a sequence of ‡o‡t pairs, none of the pairs may be incomplete. If the EOD contains a ‡o, it must be immediately followed by a ‡t. The only exception is that a ‡o containing a quantity can be alone in the record if it is the only ‡o in the field and there is not a ‡t.
- If a 949 field contains a sequence of ‡u‡w pairs, none of the pairs may be incomplete. If the EOD contains a ‡u, it must be immediately followed by a ‡w. The only exception is that a ‡u containing a fund can be alone in the record if it is the only ‡u in the field and there is not a ‡w.
- All the quantities in the 949‡o subfields are numeric.
- The ‡b and ‡c must contain unique values.
- The ‡t is mandatory at this stage - meaning that in order to create a physical item out of the EOD record in the inventory, a physical shelving location code must be provided
Configuring the Update Inventory Import Profile
The POL information is used to identify the bib. After the bib is identified, the call number information is used to identify the holding. Therefore, in the case of a bib with two POLs and two holdings, if they have an empty call number and the input file has a call number, both of them are updated with the input file’s call number information.
Inventory Operations: Physical and/or Mixed
- If the barcode exists in the repository, Alma performs a further attempt to match, this time by library and location in the input file.
- If no library and location appear in the input file, the match is done by the default values in the import profile.
- If no match is found, the item is not updated, and an error is displayed.
There is no check on the barcodes. If a barcode is submitted using the Import job, and the same barcode already exists in the system, the imported barcode is added to the item as a duplicate.
The results of this are below:
| If: | Then: |
|---|---|
| If the barcode exists in the repository and the item was updated before. | The item is skipped (for both the Basic and Advanced mapping profiles). |
| If the barcode exists in the repository and the item was not updated before. | The item is updated (for both the Basic and Advanced mapping profiles). |
| If the barcode does not exist in the repository and the Basic mapping profile is used, and there are multiple items from the same PO line in different locations. | The library/location is used to identify the item. The item is updated if it was not updated before, regardless of the barcode match. If all of the items were already updated, the incoming record is ignored. |
| If the barcode does not exist in the repository and the Advanced mapping profile is used, and there are multiple items from the same PO line in different locations. | The library/location is used to identify the item. The barcode is set for items that do not have barcodes. |
- You cannot update an item's library/location using this profile: library/location is used only to identify the item. You can update only the barcode and item policy.
- If you changed the barcodes you got from the vendor, Alma will not be able to match the correct item. It is recommended to keep the barcode you receive from the vendor and if needed, ask the vendor to update the barcode format before the initial load into Alma. If you've made a change to your barcodes (for example, removed a prefix) and the vendor did not update their information accordingly, it is recommended that you not use the update inventory profile.
Inventory Operations: Electronic and/or Mixed
For electronic PO lines, select the Portfolio type in Inventory Information tab according to your existing portfolios that you are about to update:
- Select Standalone when updating standalone portfolios. If you select this option and run the profile on portfolios that are part of a collection, they are skipped with the error "portfolios skipped (profile not allowing)".
- Select Part of an electronic collection when updating portfolios that are already part of that collection. If you select this option and run the profile on portfolios that are standalone, they are skipped with the error "portfolios skipped (profile not allowing)". These standalone portfolios will not be additionally created under the selected collection.
When Part of an electronic collection is selected and the profile is run on portfolios linked to that collection, new portfolios could be added to that collection and PO line.
Creating an Import Profile: Use Cases
Use Case: Creating a UNIMARC Profile
- Open the Import Profiles page (Resources > Import > Manage Import Profiles or Acquisitions > Import > Import Profiles).
- Select Add New Profile.
- Select the type of profile to create, and select Next. The Import Profile Details page appears.
- In the Profile Details section, select the UNIMARC Source format or Target format options to meet your requirements. Depending on the type of profile you selected to create, the UNIMARC Authority or UNIMARC Bibliographic options appear.
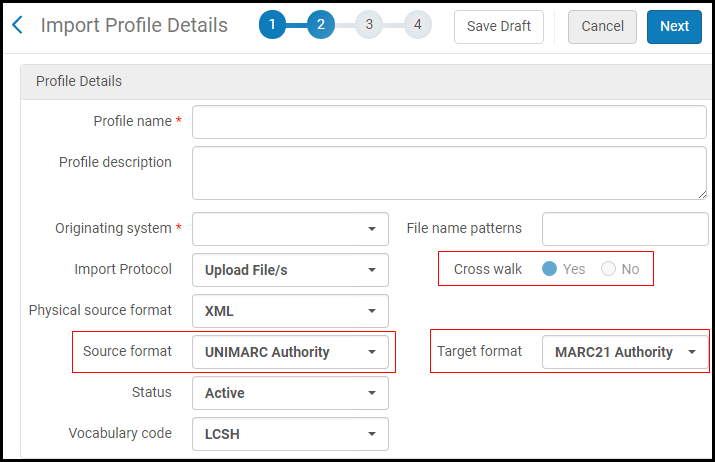 Source / Target Format Selections (Authority)
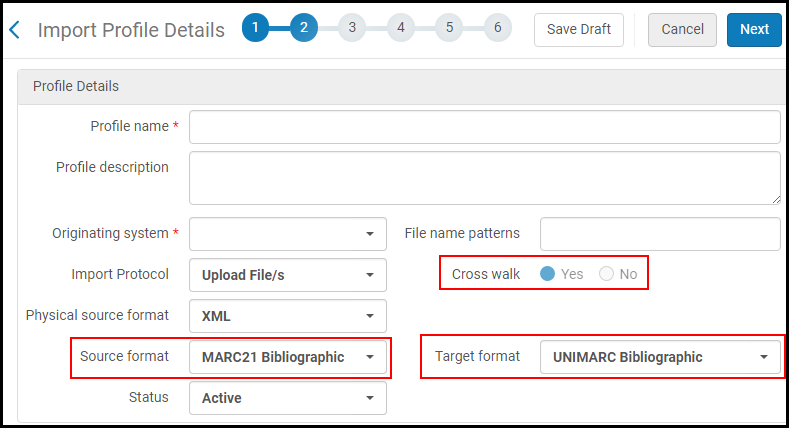 Source / Target Format Selections (Bibliographic)The Source format identifies the format of the input file (UNIMARC or MARC 21, for example) used in the import process.When the Source format and Target format are different, Alma automatically sets the Cross walk selection to Yes. This indicates that during the import process, the format of the content in the input file (the source) will be converted to the format specified in the Target format parameter. In the illustration above, the MARC 21 bibliographic contents in the input file will be converted to the UNIMARC bibliographic format during import.When you create an authority import profile and select UNIMARC Authority as the Source format and MARC 21 Authority as the Target format, the following criteria needs to be met or the records from the source input file are not imported:
- The UNIMARC leader 06 position must equal x.
- The input record must contain an entry for the UNIMARC 100 field.
If these conditions are not met, the import Job Report page will show a number of records for the Number of records not added count, and the Events Report page will have an entry for each record that is not imported indicating which of the above criteria was not met that caused the record to not be imported. See Viewing Completed Jobs for more information. - Complete the remainder of the parameters for this page referring to the Creating/Editing an Import Profile: General Profile Information section as needed, and select Next.
- Select an indication rule for the import profile (see Filtering Sets) and then select a normalization option.
If you selected UNIMARC Bibliographic for your Source format parameter, the Correct the data using parameter in the Normalization section provides the following UNIMARC options from which to choose:
- UNIMARC Bib Normalize on Save
- UNIMARC Bib Resequence
- UNIMARC Bib Resequence and Clear Empty Fields
- Select a validation exception option.
If you selected UNIMARC Bibliographic for your Source format parameter, the Handle invalid data using parameter in the Validation Exception Profile section provides UNIMARC options (as defined for the MD Editor).
- Select Next and complete the Match Profile and the Match Actions sections. The Match Profile method options provided are the same for MARC 21 and UNIMARC.
- Select Next and complete the Set Management Tags section.
- Select Next and complete the mapping options if you selected Electronic, Physical, or Mixed in the Inventory Operations section.
Be aware that the extract parameters (such as Extract access URL from field) are specific to the field formats as identified in your selection of the Source format parameter (for the input file). For example, if you identify the Source format parameter as UNIMARC Bibliographic, then the title field is 200. If you identify the Source format parameter as MARC 21 Bibliographic, then the title field is 245.
- When you are finished, select Save.
Use Case: Creating a KORMARC Profile
- Open the Import Profiles page (Resources > Import > Manage Import Profiles or Acquisitions > Import > Manage Import Profiles).
- Select Add New Profile, select New Order, Update Inventory, or Repository, and select Next (or edit the Profile Details tab of an existing import profile). The Import Profile Details page opens.
- In the Profile Details section, select KORMARC Bibliographic for your Source format and/or your Target format.
The Source format identifies the format of the input file used in the import process.When the Source format and Target format selections are different, Alma automatically sets the Cross walk selection to Yes. This indicates that during the import process, the format of the contents in the input file (the source) will be converted to the format specified in the Target format parameter. In the illustration above, the MARC 21 bibliographic contents in the input file will be converted to the KORMARC bibliographic format during import.
- Complete the remainder of the parameters for this page as you normally would and select Next.
- Select an indication rule for the import profile (see Filtering Sets) and then select a normalization option.
If you selected KORMARC Bibliographic for your Source format parameter, the Correct the data using parameter in the Normalization section, provides the following KORMARC options from which to choose:
- KORMARC Bib Normalize on Save
- KORMARC Bib Resequence
- KORMARC Bib Resequence and Clear Empty Fields
- Select a validation exception option.
If you selected KORMARC Bibliographic for your Source format parameter, the Handle invalid data using parameter in the Validation Exception Profile section, provides KORMARC options (as defined for the MD Editor).
- Select Next and complete the Match Profile and the Match Actions sections as you normally would. The Match Profile method options provided are the same for MARC 21 and KORMARC.
- Select Next and complete the Set Management Tags section as you normally would.
- Select Next and complete the mapping options if you Electronic, Physical, or Mixed in the Inventory Operations section.
Be aware that the extract parameters (such as Extract access URL from field) are specific to the field formats as identified in your selection of the Source format parameter (for the input file).
- When you are finished, select Save.
Use Case: Creating Multiple Items in Multiple Libraries/Locations
To create multiple items, set up a Repository Import Profile as follows:
- Match Profile:
Match on 001
Upon Match: Merge. Method: Keep old values
Upon no match: Do not import - Inventory Information:
Inventory Operations: Physical
Item Creation Policy: Create Items and Holdings
Library & Location and Mapping - explained below.
- Option 1 – All subfields are part of a single data field, such as 949, which includes library and location information, as well as item information, such as barcode and item policy.
- Option 2 – Library and location subfields are part of one data field, such as 949, and item subfields are part of another data field, such as 948.
- If library and location fields are mapped to more than one field (for example, the library is mapped to 950 and the location is mapped to 949), or item fields are mapped to more than one field (for example, the barcode is mapped to 949 and the item policy is mapped to 950), the import process cannot create multiple items.
- For this use case, there is no need to fill out the Holdings Record Mapping table (Creating/Editing an Import Profile: Inventory Information). The Call Number Mapping mapping table is used; see Mapping Call Numbers to Holdings.
Example of Option 1: All subfields are part of a single data field

=949 \\$mTML$tUNASSIGNED$bBARCODE-2$pPOLICY-2
=949 \\$mMAIN$tMUSIC$bBARCODE-3$pPOLICY-3

=949 \\$bBARCODE-4$bBARCODE-5$bBARCODE-6$pPOLICY-2
=949 \\$bBARCODE-7$bBARCODE-8$pPOLICY-7
=949 \\$mONL$tONL ABC$o3$bBARCODE-9$bBARCODE-10
- Three items with barcodes 1, 2, 3, and policy 1 are created at the TML/Unassigned library/location.
- Three items with barcodes 4, 5, 6, and policy 2 are created at the default library and location.
- Two items with barcodes 7 and 8, and policy 7 are created at the default library and location.
- Three items are created at the ONL/ONL ABC library/location. Two items are created with barcodes 9 and 10, and one item is created with an automatically generated barcode.
=949 \\$mONL$tONL ABC
=949 \\$o3
- Five items are created at the TML/Unassigned library/location.
- Four items are created at the ONL/ONL ABC library/location. (Since the number of items is not specified, the default number is used.)
- Three items are created at the default library and location.

Example of Option 2: Library and location are part of one data field, and item subfields are part of another
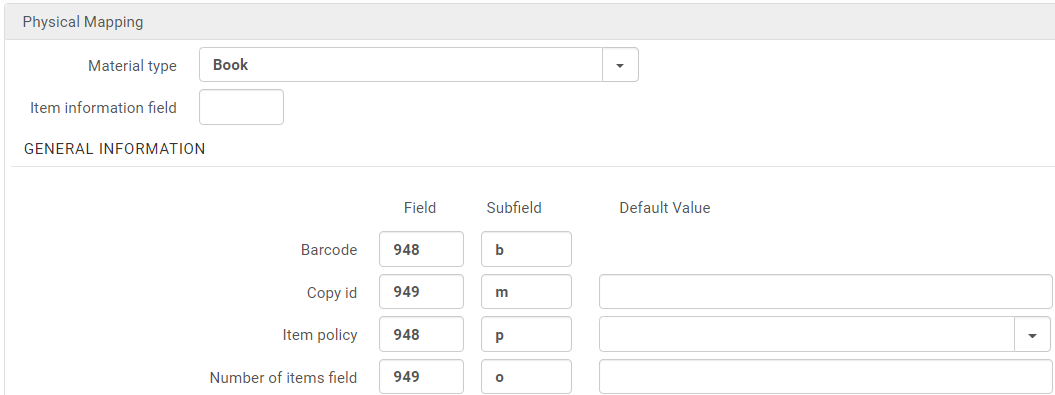
=949 \\$mONL$tONL ABC
=949 \\$mTML$tUNASSIGNED$o3
=948 $bBARCODE-1$pPOLICY-1
=948 $bBARCODE-2 =948 $bBARCODE-3 =948 $bBARCODE-4 =948 $bBARCODE-5 =948 $bBARCODE-6 =948 $bBARCODE-7 =948 $bBARCODE-8
=948 $bBARCODE-1$pPOLICY-1 =948 $bBARCODE-2 =948 $bBARCODE-3
=949 \\$mONL$tONL ABC
=948 $bBARCODE-4 =948 $bBARCODE-5 =948 $bBARCODE-6 =948 $bBARCODE-7
=949 \\$mTML$tUNASSIGNED$o3
=948 $bBARCODE-8
- Three items with barcodes 1, 2, 3 are created at the ULINC (Main Library)/Music library/location.
- Four items with barcodes 4, 5, 6, 7 are created at the ONL/ONL ABC library/location. (Since the number of items is not specified, the default number is used.)
- Three items are created at the TML/Unassigned library/location. One item is created with barcode 8, and two items are created with automatically generated barcodes.

Example Use Case
- The item library name/code comes from the 949$x
- The item location name/code comes from the 949$t
- If there is no 949$x, the default library will be Main Library
- If there is no 949$t, the default location will be General
- The number of items comes from the 949$o
- If there is no 949$o, the default number of items is 1
- One item in the Education library in the Reserves location for the Libraries of California title
- One item in the Main library in the YILIS Main Building location for the Libraries of Nevada title


Editing Import Profiles
- Catalog Administrator
- On the Run Import page ( Resources > Import > Manage Import Profiles or Acquisitions > Import > Manage Import Profiles), from the row actions list, select Edit for the import profile.
The Import Profile Details page appears.
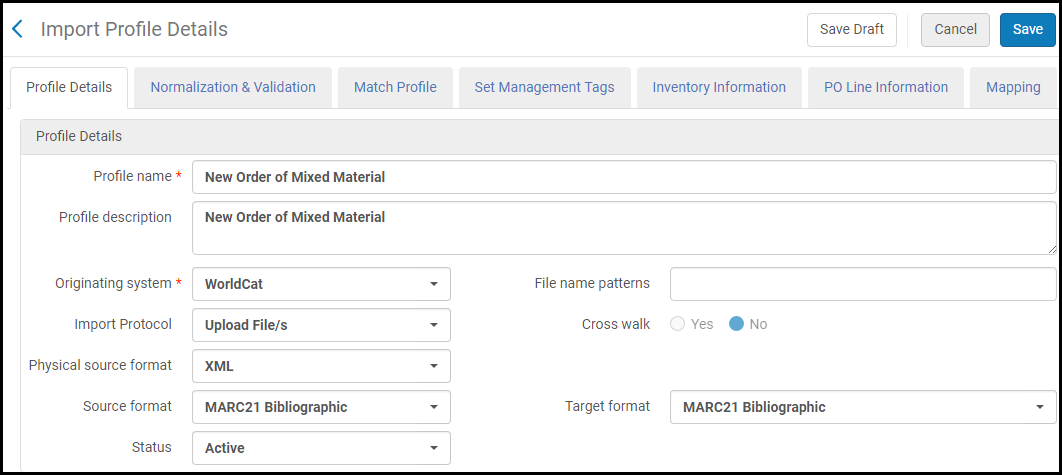 Import Profile Details PageThe Import Profile Details page has up to seven tabs, each corresponding to a wizard step when creating the profile.The Import Profile Details page includes the Mapping tab if you selected Map Library/Location, Fund Distribution Field or Map Owner check boxes in wizard steps 6 or 7. This enables you to enter the location, fund and owner mapping details. You can find a description of these check boxes in Creating/Editing an Import Profile - PO Line Information.
Import Profile Details Tabs Tab Name Reference to Field Descriptions Profile Details Creating/Editing an Import Profile - General Profile Information Normalization and Validation Creating/Editing an Import Profile - Normalization & Validation Match Profile Creating/Editing an Import Profile - Match Profile Set Management Tags Creating/Editing an Import Profile - Set Management Tags Inventory Information Digital profiles: Creating/Editing a Digital Import Profile: Inventory InformationOther profiles: Creating/Editing an Import Profile - Inventory InformationPO Line Information Creating/Editing an Import Profile - PO Line Information Mapping If you selected Map Library/Location (available for physical material only), Fund Distribution Field or Map Owner for the profile, you must enter the field mapping in this tab. See step 3 below. Use the mapping functionality when the input file contains values that should be mapped to Alma terminology. For example, when the file has fund codes that exist in the provider’s system and should be mapped to Alma’s funds.
- Edit the fields as required.
- If you selected Map Library/Location (available for physical material only), Fund Distribution Field or Map Owner for the profile, add the necessary mapping as follows:
- In the Fund Mapping section, enter the Source Value of the fund and add the destination fund by selecting the Find button and selecting the required value.
- Select Add to add the line to Fund Mapping.
- In the Location Mapping section, enter the Source Value of the location and add the destination location by selecting the Find button and selecting the required value.
- Select Add to add the line to Location Mapping.
- Select Save Draft or Save to save your changes.
Sharing Import Profiles in the Community Zone
- Purchasing Operator
- Purchasing Manager
- Repository Administrator
- Catalog Administrator
- General System Administrator
- From the row actions list, select Contribute for an import profile on the Institution tab of the Import Profiles page.
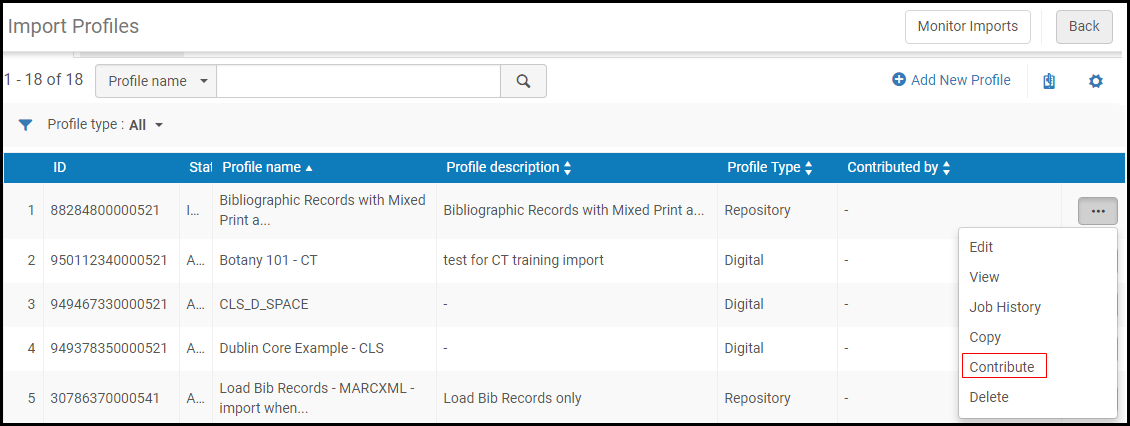 Import Profiles PageA confirmation message dialog box appears.
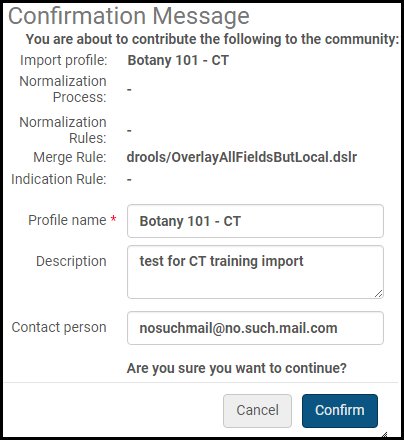 Import Profile Contribution Confirmation Message
 - You can optionally change the Profile name.
- It is recommended that you change the Description to include detailed information for institutions that will copy the profile. Include institution information such as the library information, FTP information, and/or vendor information.
- You can optionally enter or change an email address for the Contact person.
- Select Confirm. The profile appears in the Community tab and can be copied by any institution.
- Open the Community tab on the Import Profiles page (Resources > Import > Manage Import Profiles).
To view more information about the profile, from the row actions list, select View. The profile details appear. In addition to profiles that have been contributed to the community, the following import profiles are provided (out-of-the-box) by Ex Libris:
- Update Inventory:
- DAWSON - E Full record
- DAWSON - P Full record
- New Order:
- General EOD with E inventory
- General EOD with P inventory
- Repository:
- Import bibliographic records from Libris
- Update Inventory:
-
Select Copy in the row actions list of the profile. The Profile Details tab opens on the Import Profile Details page. The import profile is copied to your institution and the new profile is opened for editing. The new profile appears in the Institution tab on the Import Profiles page. Its status is Inactive by default.When you copy an import profile from the Community Zone that was created and shared from the Network Zone, the Use Network Zone parameter is set to No. This setting cannot be changed in the copied import profile.
- Edit the import profile details to match your requirements.
- When you are done, select Save.
- Select the Institution tab to view the profile that you copied. The contributor appears in the Contributed By column.

